Welcome to our guide on deploying Uptime Kuma using Docker. Whether you’re a system administrator, a developer, or just a tech enthusiast looking to monitor your services, this tutorial is crafted to help you set up Uptime Kuma from scratch. By the end of this tutorial, you’ll have a fully operational monitoring tool to keep tabs on your applications and services.
What is Uptime Kuma?
Uptime Kuma is a self-hosted monitoring tool that allows you to check various protocols such as HTTP/S, TCP, and ICMP, as well as receive notifications via multiple methods like email and webhook. Unlike commercial solutions, Uptime Kuma is free and open-source, giving users full control over their monitoring and alerting capabilities.
Why Use Docker?
Docker simplifies the deployment of applications using containers, which package up the code and all its dependencies so the application runs quickly and reliably from one computing environment to another. Using Docker, you can easily manage, deploy, and scale your instances of Uptime Kuma without worrying about conflicting dependencies or variations in operating environments.
Prerequisites
Before you begin, ensure you have the following:
- Docker installed on your machine (check our Docker installation guide).
- Basic understanding of terminal commands.
- Optional: Docker Compose, if you prefer using it for managing multi-container Docker applications.
Step 1: Deploying Uptime Kuma
Pull the Uptime Kuma image from Docker Hub:
docker pull louislam/uptime-kuma:1
Run the Uptime Kuma container:
docker run -d --restart=always -p 80:3001 -v uptime-kuma:/app/data --name uptime-kuma louislam/uptime-kuma:1
-druns the container in detached mode (in the background).--restart=alwaysensures the container restarts if it crashes or if you restart your computer.-p 80:3001maps port 3001 inside the container to port 80 on your host.-v uptime-kuma:/app/datacreates a volume for persistent data.--name uptime-kumanames your container.
Access Uptime Kuma:
- Open your web browser and go to
http://localhostorhttp://<your-server-ip>to access the Uptime Kuma dashboard.
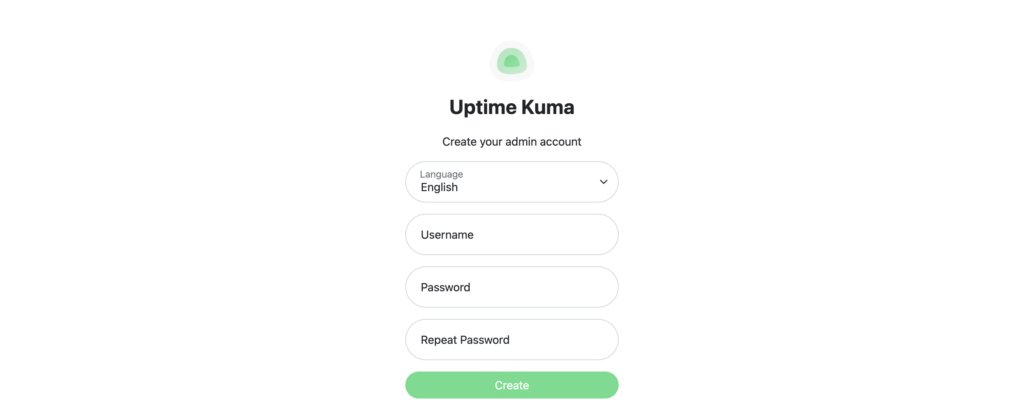
Step 2: Configuring Uptime Kuma
Once Uptime Kuma is running, you can add monitors and notifications:
- Click ‘Add New Monitor’.
- Enter the details of the service you want to monitor.
- Set up notifications through the settings menu.

Congratulations! You have successfully deployed Uptime Kuma using Docker. This setup not only provides you with robust monitoring capabilities but also introduces you to the power and flexibility of Docker containers. Explore further by adding more services to monitor and configuring advanced alerting options to enhance your monitoring framework.