If you find yourself enthusiastic about tapping into the robust functionalities that Drupal has to offer, particularly on the most recent iteration of Ubuntu, version 23, you’ve landed on the right page. This step-by-step guide is designed to take you through the installation process, ensuring a seamless and user-friendly experience as you embark on setting up your website with the power of Drupal.
Section 1: Grasping the Fundamentals
Prior to immersing ourselves in the installation procedure, it’s essential to pause and comprehend the essence of Drupal and the reasons behind its popularity among developers. Drupal stands out as a potent, adaptable, and expandable content management system (CMS), providing users with the ability to craft and oversee a diverse array of websites. Its capabilities span from personal blogs to intricate e-commerce platforms, making it a preferred choice for a myriad of development projects.
Section 2: Essential Requirements
Before initiating the installation, it is crucial to confirm that your Ubuntu 23 system fulfills the requisite prerequisites. This involves ensuring the presence of a LAMP (Linux, Apache, MySQL, PHP) stack. If you haven’t established the LAMP stack yet, there’s no need to fret; we’ll provide step-by-step guidance to facilitate the setup process.
Section 3: Configuring the LAMP Stack
For a successful installation of Drupal, it is imperative to have a fully operational LAMP stack. Our guidance will walk you through each stage of the process, starting with the installation of Apache, followed by the configuration of MySQL and PHP. The harmonious collaboration of these components is paramount to achieving optimal performance for your Drupal setup.
Ensure your Ubuntu 23 system is up to date. Open a terminal and run the following commands:
sudo apt update
sudo apt upgrade
Apache is a widely-used web server. Install it by executing:
sudo apt install apache2
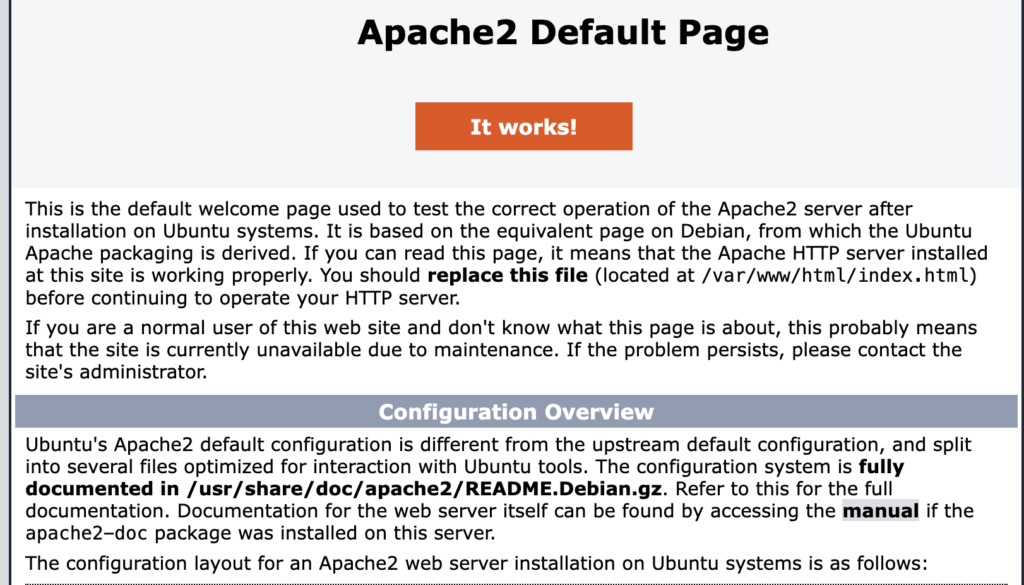
To check if Apache is running, open your web browser and enter your server’s IP address. You should see the default Apache page.

MySQL is a powerful relational database management system. Install it with:
sudo apt install mysql-server
PHP is a server-side scripting language. Install it and some necessary modules:
sudo apt install php libapache2-mod-php php-dev php-bcmath php-intl php-soap php-zip php-curl php-mbstring php-mysql php-gd php-xml
In order for the changes to apply you need to restart Apache
service apache2 restartRun the following command to secure your MySQL installation:
sudo mysql_secure_installation

Securing the MySQL server deployment.

Connecting to MySQL using a blank password.

VALIDATE PASSWORD COMPONENT can be used to test passwords
and improve security. It checks the strength of password
and allows the users to set only those passwords which are
secure enough. Would you like to setup VALIDATE PASSWORD component?

Press y|Y for Yes, any other key for No: y

There are three levels of password validation policy:

LOW    Length >= 8
MEDIUM Length >= 8, numeric, mixed case, and special characters
STRONG Length >= 8, numeric, mixed case, special characters and dictionary                  file

Please enter 0 = LOW, 1 = MEDIUM and 2 = STRONG: 1

Skipping password set for root as authentication with auth_socket is used by default.
If you would like to use password authentication instead, this can be done with the "ALTER_USER" command.
See https://dev.mysql.com/doc/refman/8.0/en/alter-user.html#alter-user-password-management for more information.

By default, a MySQL installation has an anonymous user,
allowing anyone to log into MySQL without having to have
a user account created for them. This is intended only for
testing, and to make the installation go a bit smoother.
You should remove them before moving into a production
environment.

Remove anonymous users? (Press y|Y for Yes, any other key for No) :

 ... skipping.


Normally, root should only be allowed to connect from
'localhost'. This ensures that someone cannot guess at
the root password from the network.

Disallow root login remotely? (Press y|Y for Yes, any other key for No) :

 ... skipping.
By default, MySQL comes with a database named 'test' that
anyone can access. This is also intended only for testing,
and should be removed before moving into a production
environment.


Remove test database and access to it? (Press y|Y for Yes, any other key for No) :

 ... skipping.
Reloading the privilege tables will ensure that all changes
made so far will take effect immediately.

Reload privilege tables now? (Press y|Y for Yes, any other key for No) :

 ... skipping.
All done!
Section 4: Downloading and Preparing Drupal
Now that our LAMP stack is up and running on Ubuntu 23, let’s move on to setting up Drupal, a powerful and flexible content management system (CMS). Follow these steps to download and prepare Drupal for your website.
Step 1: Download Drupal
Visit the official Drupal website and find the latest version. Copy the download link for the tar.gz file.
cd ~
wget https://www.drupal.org/download-latest/tar.gz
Step 2: Extract Drupal Archive
Extract the downloaded tar.gz file to the Apache web root directory.
sudo tar -zxvf tar.gz -C /var/www/html/Step 3: Configure Permissions
Adjust the ownership and permissions to ensure Drupal can operate smoothly.
chown -R www-data:www-data /var/www/html/drupal-10.2.3

find . -type d -exec chmod 755 {} \;

find . -type f -exec chmod 644 {} \;
Step 4: Create a Database for Drupal
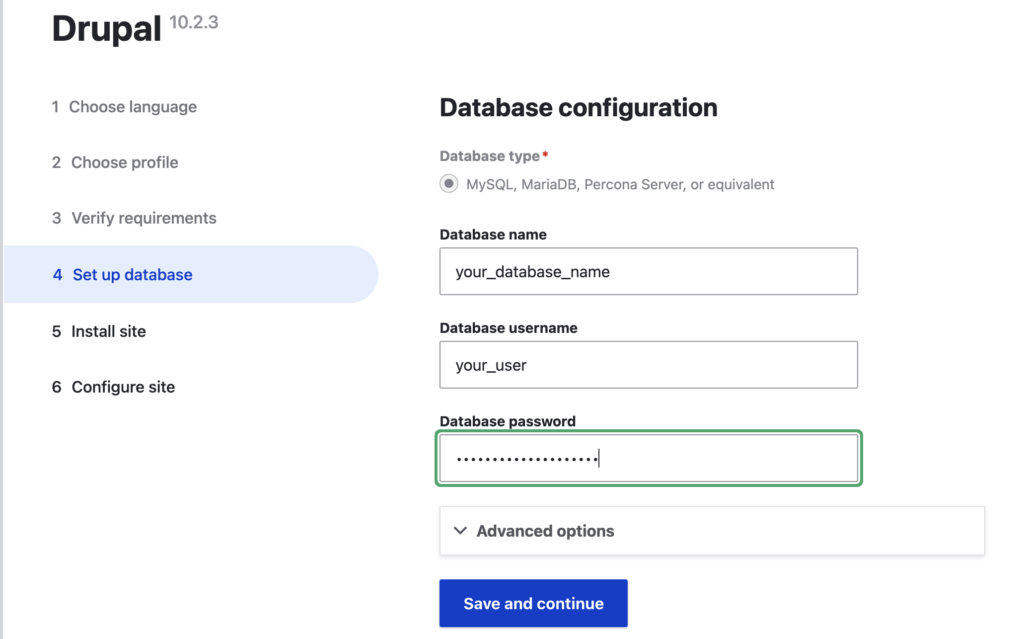
Log in to MySQL and create a database for Drupal. Replace ‘your_database_name,’ ‘your_user,’ and ‘your_password’ with your desired values.
mysql -u root -pCREATE DATABASE your_database_name;
CREATE USER 'your_user'@'localhost' IDENTIFIED BY 'YourStronG_P@$sword4';
GRANT ALL PRIVILEGES ON your_database_name.* TO 'your_user'@'localhost';
FLUSH PRIVILEGES;
EXIT;Step 5: Web Server Configuration
Create a New Apache Configuration File:
sudo nano /etc/apache2/sites-available/drupal.confAdd the Following Configuration:
<VirtualHost *:80>
    ServerAdmin [email protected]
    DocumentRoot /var/www/html
    ServerName yourdomain.com
    <Directory /var/www/html/>
        Options FollowSymlinks
        AllowOverride All
        Require all granted
    </Directory>
    ErrorLog ${APACHE_LOG_DIR}/error.log
    CustomLog ${APACHE_LOG_DIR}/access.log combined
</VirtualHost>
Enable the New Configuration:
sudo a2ensite drupal.confRestart Apache:
sudo systemctl restart apache2Install Certbot on Apache
sudo apt install certbot python3-certbot-apache
sudo certbot --apache
Section 7: Drupal Installation Wizard
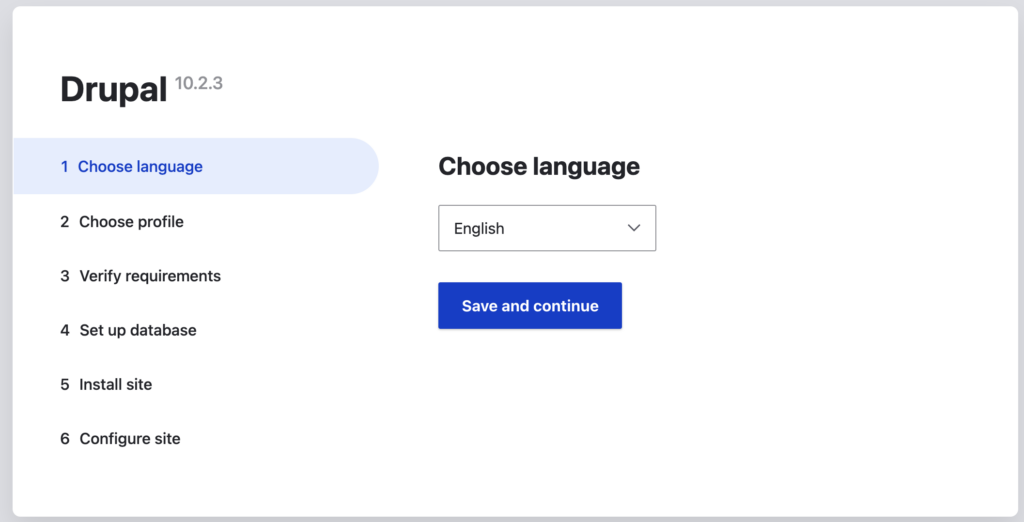
With everything set up, it’s time to run Drupal’s installation wizard. We’ll guide you through the process of providing essential information, such as database credentials, site name, and administrator account details.

Open your web browser and navigate to your domain, followed by ‘/drupal-10.2.3’. Follow the on-screen instructions to complete the Drupal installation. Provide the database details created in Step 4 when prompted.

Congratulations! You’ve successfully installed Drupal on Ubuntu 23. Keep in mind that security is an ongoing process, so stay informed about best practices and updates to ensure a secure and stable Drupal installation.


How to install LAMP stack on Ubuntu - SysNestor
February 17, 2024[…] you through the process of installing the LAMP stack on the latest Ubuntu 23, ensuring a seamless setup for your web development […]