
This article aims to guide you through the process of setting up and running a basic Flask on Ubuntu system. We will cover the installation of Python and Flask, setting up a simple web application, and ensuring it runs smoothly on your Ubuntu server. By the end of this tutorial, you will have a clear understanding of how to leverage Flask’s simplicity and Ubuntu’s reliability to build and deploy a functioning web application.
What is Flask
Flask, a lightweight and flexible Python web framework, stands as a go-to choice for developers eager to create scalable and maintainable web applications with minimal fuss. Unlike heavier frameworks that prescribe a specific way to handle every element of a web application, Flask provides the bare essentials, allowing developers to add only what they need through extensions. This makes Flask not only versatile but also highly efficient for both small and large-scale projects.
Ubuntu, renowned for its stability and extensive support, is favored among developers, especially when deploying applications. Its widespread adoption is further supported by comprehensive documentation and a robust community, making it an ideal environment for development and production servers.
Prerequisites
Before diving into the installation of Flask on Ubuntu, there are a few prerequisites you’ll need to ensure a smooth setup process. First and foremost, you’ll need:
- Ubuntu Operating System: Ensure that you have Ubuntu installed on your machine. This guide assumes you are using Ubuntu 20.04 LTS or later, which is recommended for its long-term support and compatibility.
- Basic Knowledge of Using a Terminal: Familiarity with using the command line interface is crucial as you will be running various commands to set up and manage your Flask application.
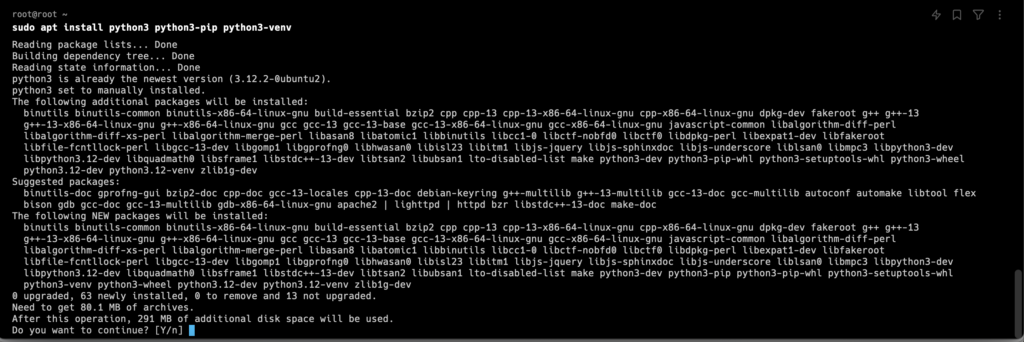
Once you’ve checked these prerequisites, the next step is to prepare your system by updating the package list and installing some essential tools. Open your terminal and execute the following commands:
Update the Package List: This command updates the list of packages and their versions on your Ubuntu machine from the repositories. It ensures you can install the latest available versions of software.
sudo apt updateInstall Essential Tools: These include tools like python3, pip (a Python package installer), and venv for creating virtual environments. Virtual environments allow you to manage dependencies for your projects separately.
sudo apt install python3 python3-pip python3-venv python3-virtualenv pipx
Running these commands sets the stage for a successful Flask installation and ensures that your system is up to date with all the necessary tools to start development.
Setting Up a Virtual Environment
In Python development, a virtual environment is an isolated workspace that allows you to manage dependencies for individual projects separately. By using a virtual environment, you ensure that libraries and versions installed for one project do not interfere with those of another. This is crucial in maintaining project-specific dependencies without conflicting with the global Python installation, thereby avoiding the “works on my machine” problem.
First, install the virtualenv package, which lets you create virtual environments in Python. Open your terminal and execute the following command:
pipx install virtualenvNext, create a new virtual environment for your Flask project:
virtualenv flask_env
To start using this virtual environment, you need to activate it. Run:
source flask_env/bin/activateYou’ll notice the command prompt changes to indicate that you are now working inside the flask_env virtual environment.
Installing Flask on Ubuntu
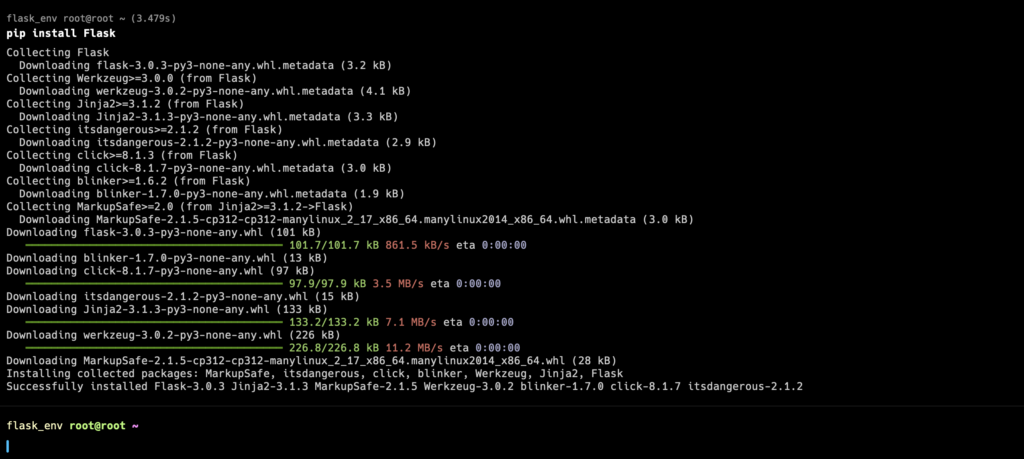
Within the activated virtual environment, you can now install Flask using pip, the Python package installer:
pip install Flask
To confirm that Flask has been installed correctly and to check the installed version, use the following command:
python -m flask --versionThis command will display the Flask version along with its dependencies, such as Werkzeug and Jinja, confirming that Flask is ready to be used for developing your application.

Creating Your First Flask Application
To begin with Flask, it’s essential to set up a basic directory structure for your project. Here’s a simple layout:
your_project/– The root directory of your project.app.py– The main Python file with your Flask application.templates/– A directory for HTML templates (if needed later).static/– A directory for static files like CSS and JavaScript (if needed later).
For a basic “Hello, World!” application, create a file named app.py in your project directory and input the following Python code:
from flask import Flask
app = Flask(__name__)

@app.route('/')
def hello_world():
    return 'Hello, World!'

if __name__ == '__main__':
    app.run(debug=True)
Explanation of the Code:
from flask import Flask: This line imports the Flask class from the Flask library.app = Flask(__name__): This line creates an instance of the Flask class.__name__is a Python special variable which gives Python files a unique name to allow Flask to identify resources, especially when more than one file is involved.@app.route('/'): This is a decorator that tells Flask what URL should trigger the function that follows.def hello_world(): Defines a function that is called when the root URL/is accessed.return 'Hello, World!': The function returns the string ‘Hello, World!’, which is displayed in the web browser.if __name__ == '__main__':: An important Python idiom. It means execute this code only if the file was run directly, not imported.app.run(debug=True): This starts the Flask application.debug=Trueenables debug mode, including an interactive debugger and reloader.
Running the Flask Application: To run your Flask application, you need to tell Flask where to find it. Use the terminal, navigate to your project directory, and set the FLASK_APP environment variable to your application:
export FLASK_APP=app.pyThen, you can start your application by running:
flask run --host=0.0.0.0This command will start a local web server. By default, it’s accessible at http://server-IP:5000/ in your web browser, where you’ll see “Hello, World!” displayed.
Congratulations on setting up and running your first Flask application on Ubuntu! This introductory project serves as a stepping stone into the versatile world of web development with Flask and Python. As you grow more comfortable with the basics, you’re well-prepared to explore more complex and dynamic web applications.
Flask provides a solid foundation, but it truly shines when you start incorporating databases, user authentication, forms, and other web functionalities into your projects. Each addition allows you to tailor your applications to specific needs and functionalities, making your journey in Flask both exciting and rewarding.
To further enhance your skills and knowledge in Flask and web development, consider exploring the following resources:
- Flask Mega-Tutorial by Miguel Grinberg: This comprehensive tutorial covers everything from simple beginnings to advanced topics like user authentication and deployment.
- “Flask Web Development” by Miguel Grinberg (O’Reilly Media): This book is an excellent resource for developers looking to dive deeper into Flask, providing both fundamental concepts and practical applications.
- Real Python (realpython.com): A treasure trove of Python tutorials and projects, including many Flask-specific guides that range from beginner to advanced levels.
- Full Stack Python (fullstackpython.com): This website explains various Python web development concepts and links to numerous tutorials and resources, helping you understand the broader context of what you can build with Flask.
By utilizing these resources, you’ll not only improve your Flask skills but also gain insights into building robust, efficient, and scalable web applications. Remember, the key to mastering Flask lies in continuous learning and practical application. So, keep experimenting, keep learning, and enjoy your journey through the exciting world of Python web development!

Comments (1)