Are you contemplating the need to deactivate image attachment pages within your WordPress setup?

These pages, often appearing somewhat incomplete, can potentially detract from the overall user experience. Imagine a scenario where a visitor stumbles upon one of these pages – the aesthetics might seem lacking, and the navigation can be less than intuitive. In such instances, rather than embarking on a quest to locate the attachment or its parent post, many visitors might opt for a swift exit, leaving behind an unfavorable impression.
Fret not, for this article is your compass through the intricate landscape of WordPress, where we’ll illuminate the path to disabling image attachment pages. Our mission is not just to impart technical wisdom but to guide you in redirecting these pages seamlessly to their parent posts, elevating the user experience.
So, if you find yourself yearning for a more polished and cohesive presentation on your WordPress site, join us in this expedition as we unravel the steps to bid adieu to image attachment pages and ensure a visitor’s journey is a seamless and gratifying one.
Ever wondered why it might be prudent to bid farewell to image attachment pages in your WordPress realm? Let’s peel back the layers to uncover the rationale.
WordPress, by default, crafts distinct pages for each image attachment, complete with their own unique URLs. On the surface, this might appear innocuous, but delving deeper reveals potential pitfalls:
- SEO Concerns:
- Duplicate content woes can rear their head when search engines index both the primary image and its corresponding attachment page. This duplication may cast a shadow on your site’s SEO performance, potentially affecting its ranking and visibility.
- User Experience Trepidations:
- The saga of image attachment pages unfolds with a lack of context and navigation, presenting a less-than-ideal user experience. Visitors stumbling upon these pages might find themselves in a digital wilderness, devoid of clear paths or meaningful information.
Now that the why is crystal clear, let’s embark on the how. In the ensuing segments, we’ll navigate two distinct methods, guiding you through the process of disabling those image attachment pages in WordPress, all in the pursuit of a more streamlined, SEO-friendly, and visitor-centric digital terrain.
Method 1: Disable Image Attachment Pages with a Plugin – All in One SEO (AIOSEO)
If you’re seeking a hassle-free route to bid adieu to image attachment pages in your WordPress universe, look no further than the prowess of a robust SEO plugin like All in One SEO (AIOSEO). Here’s your roadmap to a seamless transition:
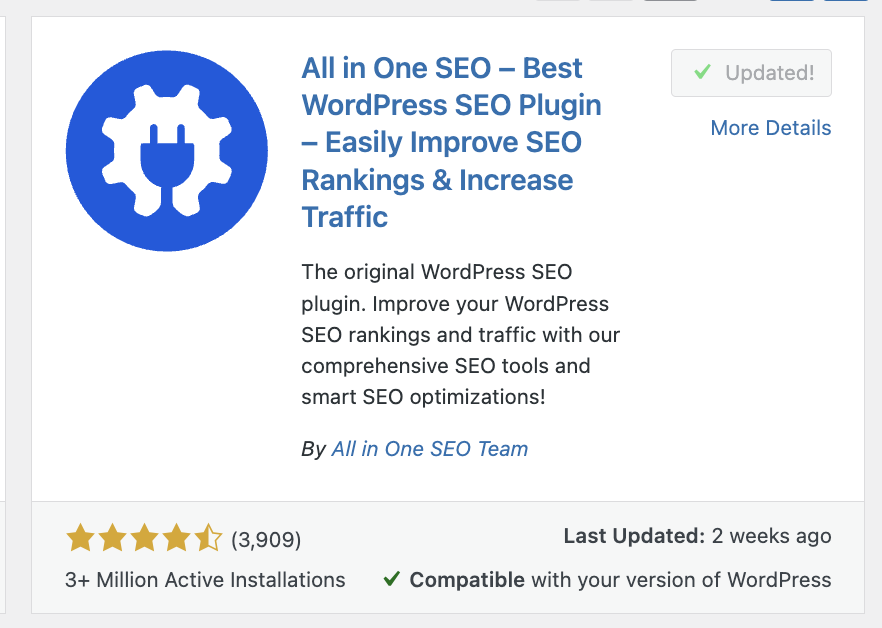
- Install and Activate AIOSEO:
- Navigate to your WordPress dashboard, saunter over to Plugins > Add New.
- In the search bar, type “All in One SEO,” locate the plugin, and proceed to install and activate it.

- Access Media Settings:
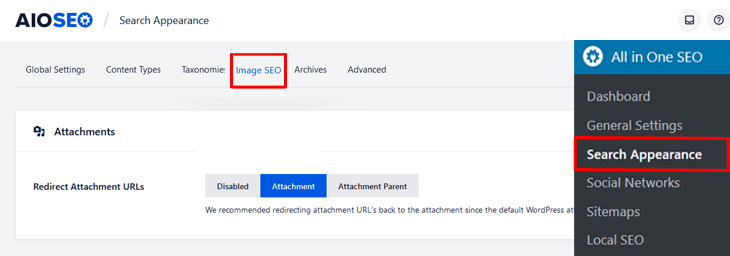
- With AIOSEO now part of your digital arsenal, head to All in One SEO > Search Appearance.
- As you meander through the settings landscape, locate the ‘Image SEO’ section.
- Disable Attachment Pages:
- Within the Media section, a gem awaits – the option aptly labeled “Redirect Attachment URLs.”
- Toggle this option to the ‘Enabled’ position, signaling AIOSEO to take charge.

- Save Changes:
- As the final flourish, ensure you save these transformative changes. Your WordPress site is now equipped with the prowess to automatically redirect image attachment pages to their rightful abodes – either the parent post or the media file itself.
With this user-friendly intervention, AIOSEO seamlessly integrates into your WordPress environment, affording you the luxury of a more streamlined, SEO-savvy, and visitor-friendly digital narrative. Take the leap, and let your WordPress journey be one devoid of the pitfalls of image attachment pages.
Method 2: Disable Image Attachment Pages with a Code Snippet
For those who relish a hands-on journey through the code-sculpted corridors of WordPress, the path to disabling image attachment pages is equally accessible. Here’s your guide to weaving this digital tapestry directly into your theme’s functions.php file:
- Access Theme Editor:
- Begin your odyssey in the WordPress dashboard; navigate gracefully to Appearance > Theme Editor.
- Locate functions.php:
- As the Theme Editor unveils its array of files on the right side, seek out and gracefully click on the ‘Theme Functions’ or functions.php file – the portal to your theme’s underlying code.
- Add Code Snippet:
- With the functions.php file at your fingertips, delve into the digital realm by adding the following code snippet at the end of the file:
function disable_attachment_pages_redirect() {
    global $post;
    if (is_attachment() && isset($post->post_parent) && $post->post_parent) {
        wp_redirect(get_permalink($post->post_parent), 301);
        exit();
    } else {
        return;
    }
}
add_action('template_redirect', 'disable_attachment_pages_redirect');
This snippet, a digital wizardry of sorts, orchestrates the redirection dance for image attachment pages, ensuring they gracefully lead visitors to either the parent post or the homepage.
- Save Changes:
- As the final flourish, cherish the timeless tradition of saving your edits. Your theme’s functions.php file now bears the mark of this code snippet, steering your WordPress ship away from the shoals of image attachment pages.
With this code symphony, you’ve not just disabled image attachment pages; you’ve curated a bespoke experience for your visitors, underlining the essence of a hands-on, code-driven approach in the vast expanse of WordPress customization.
Summary
By disabling image attachment pages in WordPress, you can enhance both your site’s SEO performance and user experience. Whether you opt for the simplicity of a plugin like All in One SEO or prefer the control of a code snippet, implementing these steps will help you take control of your WordPress site’s content and presentation. Choose the method that suits your preferences, and enjoy a more streamlined website experience for both you and your visitors.
