
This article will carefully walk you through the installation of WordPress on Ubuntu 22.04 LTS, making sure that your web experience gets off to a good start. Building a dynamic online presence is essential in the constantly changing digital landscape. WordPress has become a top choice for building aesthetically pleasing and highly functional websites thanks to its user-friendly interface and diverse ecosystem of plugins. You’ve made the right choice if you’ve decided to host your WordPress site on the dependable Ubuntu 22.04 LTS.
Requirements for Installing WordPress on Ubuntu 22.04 LTS
Let’s make sure you have all the required prerequisites on hand before we get into the specifics of the installation process. Following are the requirements for installing WordPress on Ubuntu 22.04 LTS:
- Ubuntu 22.04 LTS: To get started, ensure you have a clean installation of Ubuntu 22.04 LTS on your chosen server or local machine. If you haven’t already, you can conveniently download Ubuntu 22.04 LTS from the official website.
- LAMP Stack: WordPress relies on the LAMP stack, which stands for Linux, Apache, MySQL, and PHP. These components are essential for its proper functionality. Thankfully, Ubuntu 22.04 LTS simplifies the installation process with a one-click LAMP stack installation feature.
- Secure Shell (SSH) Access: Having SSH access to your server will be invaluable, especially for remote management of your WordPress installation. Depending on your operating system, you can utilize tools like PuTTY for Windows or the built-in SSH client for Linux and macOS.
- Domain Name: While not an immediate requirement during the installation process, having a domain name prepared in advance will be essential for accessing your WordPress site once it’s up and running.
After you have taken care of these prerequisites, let’s begin the installation process step-by-step.
Step 1: Update Your Ubuntu 22.04 LTS System
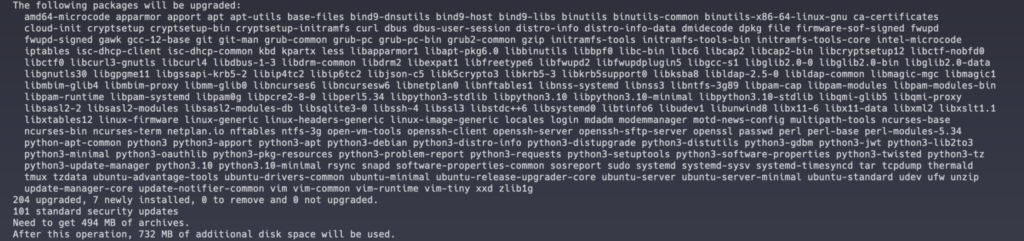
Make sure your Ubuntu system is up to date before beginning the WordPress installation. This step ensures that your system has the most recent security patches and software installed. Enter the following commands into the terminal:
sudo apt update && apt upgrade -yThis will make sure that your Ubuntu system is prepared for installing WordPress.
Step 2: Installing the LAMP Stack
The LAMP stack is the foundational framework upon which WordPress thrives. Thankfully, Ubuntu 22.04 LTS streamlines this process significantly. Execute the following command to effortlessly install the LAMP stack:
sudo apt install lamp-server^
After the installation of LAMP is done you can check the status of your MySQL, Apache, and PHP version. Use the following commands:
systemctl status mysql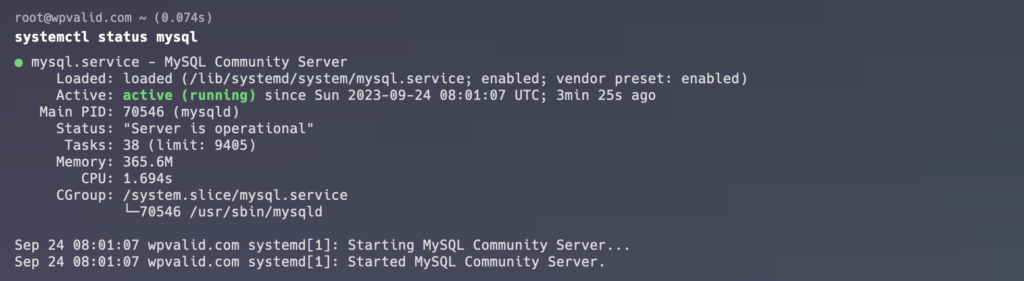
service apache2 status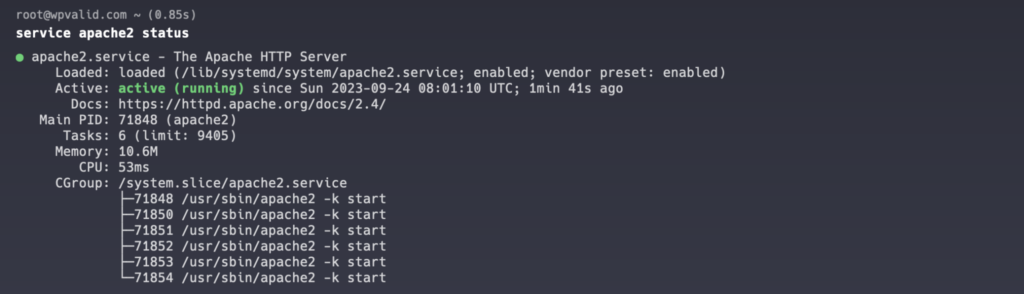
php -v
Step 3: Creating a MySQL Database and User for WordPress
To store your website’s data securely, it’s essential to create a MySQL database and a dedicated user for WordPress on Ubuntu. Here’s how you can do it:
Start by accessing the MySQL server using the following command:
sudo mysqlOnce you’re in the MySQL prompt, execute the following commands:
CREATE DATABASE wordpress;
CREATE USER 'wordpressuser'@'localhost' IDENTIFIED BY 'WPVALID-STRONG-Pa$$word';
GRANT ALL PRIVILEGES ON wordpress.* TO 'wordpressuser'@'localhost';
FLUSH PRIVILEGES;
EXIT;
Make sure you’re using a strong, personal password of your choice for 'WPVALID-STRONG-Pa$$word'.
Step 4: Downloading and Configuring WordPress
Now that the basic building blocks are in place, it’s time to download and set up WordPress on Ubuntu. Here is a detailed explanation:
Start by going to the root directory of your web server:
cd /var/www/htmlNow, proceed to download the latest version of WordPress on Ubuntu:
sudo wget https://wordpress.org/latest.tar.gzExtract the downloaded file:
sudo tar -xzvf latest.tar.gzMove the extracted WordPress files to the appropriate directory:
sudo mv wordpress/* .
rm -rf index.html
To create a configuration file for WordPress on Ubuntu, execute the following command:
sudo cp wp-config-sample.php wp-config.phpOpen the wp-config.php file using a text editor:
sudo nano wp-config.phpLocate the following lines within the file and update them with your MySQL database details:
define('DB_NAME', 'wordpress');
define('DB_USER', 'wordpressuser');
define('DB_PASSWORD', 'WPVALID-STRONG-Pa$$word');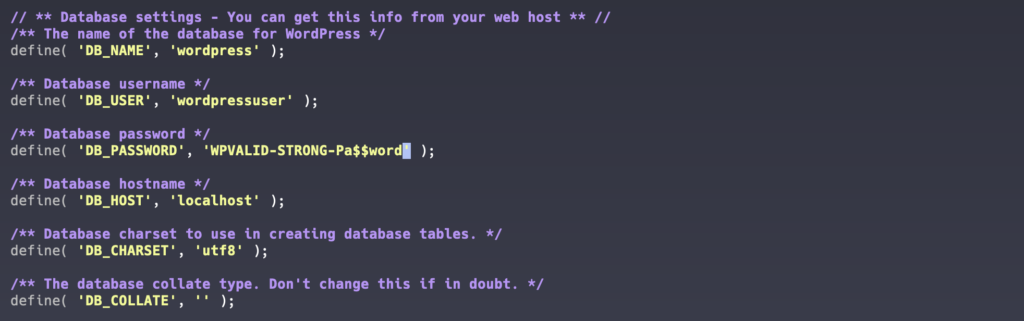
Save and close the file once you’ve made these changes.
Step 5: Setting Up Virtual Hosts
Apache must be configured properly in order for WordPress to run at its best. Here is a detailed guide on how to do it:
Create a virtual host configuration file for your site:
sudo nano /etc/apache2/sites-available/wordpress.confInsert the following content into the file, ensuring that you replace wordpress.wpvalid.com with your actual domain name (if you have one):
<VirtualHost *:80>
    ServerAdmin [email protected]
    DocumentRoot /var/www/html/
    ServerName wordpress.wpvalid.com
    ServerAlias www.wordpress.wpvalid.com

    ErrorLog ${APACHE_LOG_DIR}/error.log
    CustomLog ${APACHE_LOG_DIR}/access.log combined
</VirtualHost>
Save the file and proceed to enable the virtual host:
sudo a2ensite wordpress.confTo ensure that the changes take effect, restart Apache:
sudo systemctl restart apache2Step 6: Completing the Installation via Web Browser
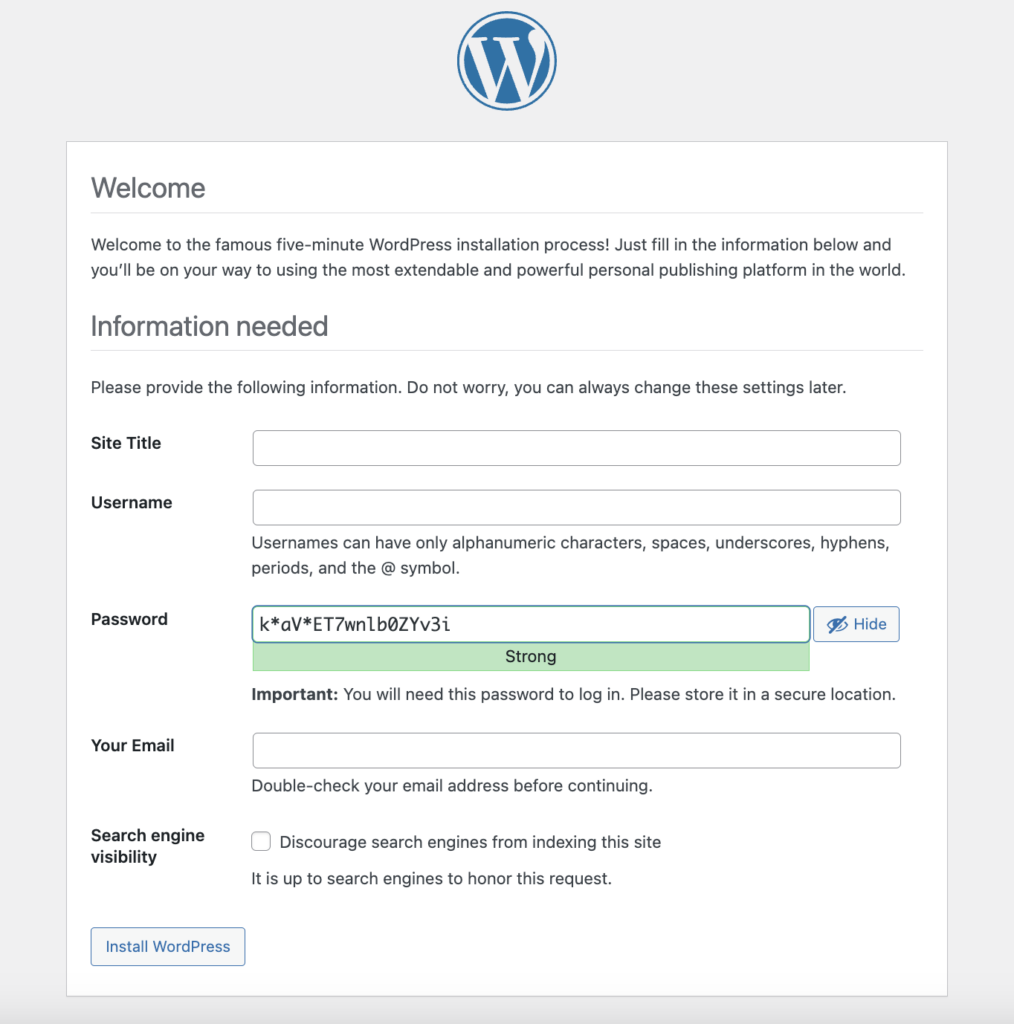
The server-side configurations are now set up, and you can finish installing WordPress on Ubuntu through your web browser. Here’s what to do next:
- Open your preferred web browser and navigate to the following address:
http://your_domain.com- The setup wizard for WordPress will appear when you arrive. To provide important details about your website, including your database details, follow the on-screen instructions.
Congratulations! You have completed the challenging process of installing WordPress on Ubuntu 22.04 LTS. You are now prepared to set out on an engaging web journey where there are no restrictions on your creativity. Using WordPress on Ubuntu 22.04 LTS gives you a strong and secure platform on which to establish your online presence. This adaptable combination will meet your needs whether you want to start a blog, build an e-commerce platform, or display your portfolio.
Continue to keep your system and WordPress installation updated as you move forward with your WordPress journey. In order to maintain peak performance and increase security for your website, regular updates are essential. Take advantage of this chance to create a work of digital art, and may your WordPress-powered website shine brightly in the vast internet.
Comments (6)