

Meet Apache, the unsung hero of the internet, tirelessly powering websites across the digital frontier. Think of it as the behind-the-scenes maestro, orchestrating the complex dance of data to deliver seamless web experiences. Now, enter AlmaLinux, the reliable sidekick providing the sturdy stage for this performance. Picture them as the dynamic duo ensuring your favorite websites not only dazzle but also stand resilient against digital storms. It’s like having the Avengers of the online world, with Apache as Iron Man and AlmaLinux as the Hulk – a powerhouse combo. In this ever-shifting landscape, they’re the guardians, crafting a secure and robust web infrastructure that keeps the digital show running smoothly.
Section 1: Prerequisites
Before embarking on the installation journey of Apache on your system, ensure you have the essential prerequisites in place. Firstly, a fresh instance of AlmaLinux 9.3 must be up and running. This ensures a clean slate, minimizing potential conflicts during the installation process. Additionally, you’ll need a user account with sudo privileges, granting the necessary administrative rights for seamless execution of commands.
A fundamental grasp of the command line is crucial. While the installation process involves a series of commands, a basic understanding of the command-line interface will empower you to navigate, configure, and troubleshoot effectively. This knowledge forms the backbone of managing and maintaining Apache on your AlmaLinux system.
By verifying these prerequisites, you lay a solid foundation for a successful Apache installation, setting the stage for a robust and reliable web server environment on your AlmaLinux instance.
Section 2: Update the System
Keeping your system up-to-date is paramount for security, stability, and optimal performance. Before diving into Apache installation, ensure AlmaLinux is current by running the following commands:
sudo dnf update
This command leverages the DNF package manager to fetch and apply the latest updates. Regular updates patch vulnerabilities, introduce enhancements, and maintain compatibility. A well-maintained system ensures a smooth Apache installation, reducing the risk of potential issues. Stay proactive in system updates to fortify your server against emerging threats and guarantee a robust foundation for your web server.
Section 3: Install Apache on AlmaLinux 9.3
Step 1: Open a Terminal
To begin, open a terminal on AlmaLinux. You can do this by pressing Ctrl + Alt + T or searching for “Terminal” in the applications menu.
Step 2: Install Apache
Now, let’s install Apache using the DNF package manager. Execute the following command:
sudo dnf install httpd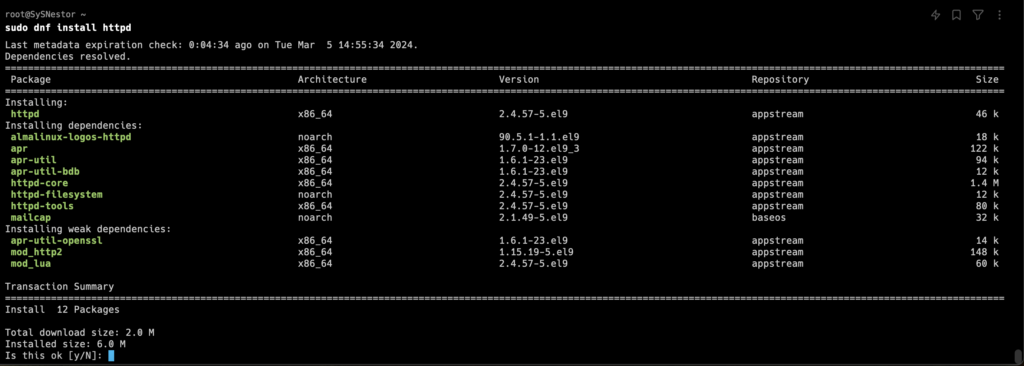
This command prompts DNF to fetch and install the Apache web server. During installation, you might be asked to confirm by typing ‘y’ and then pressing Enter. Once completed, you’ll see a summary of the installed packages.
Step 3: Start Apache
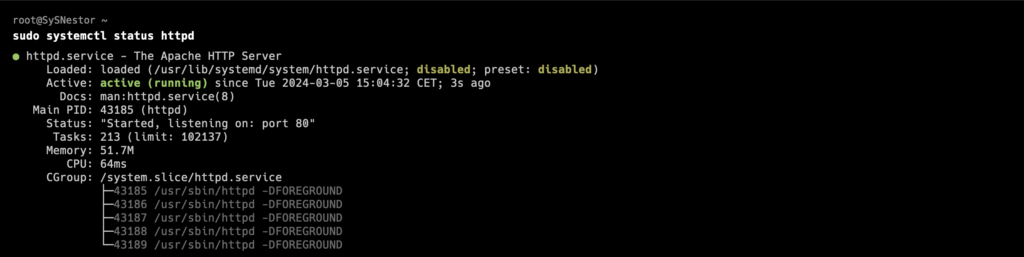
After installation, start the Apache service with:
sudo systemctl start httpdVerify its status with:
sudo systemctl status httpdIf Apache is running, you’ll see an “active (running)” status, like this:
Step 4: Configure Firewall
In case you are using Firewall, to allow web traffic, adjust the firewall settings. Open the necessary ports (80 for HTTP and 443 for HTTPS) with:
sudo firewall-cmd --permanent --add-port=80/tcp
sudo firewall-cmd --permanent --add-port=443/tcp
Reload the firewall for the changes to take effect:
sudo firewall-cmd --reloadThis step is crucial for external access to your web server. The firewall configuration ensures that HTTP and HTTPS traffic can reach Apache without interference.
By following these steps, you’ve successfully installed Apache on AlmaLinux, initiated the service, and secured its accessibility through the firewall. Your system is now primed to host web content and applications with the power of the Apache web server.
Section 4: Verify the Installation
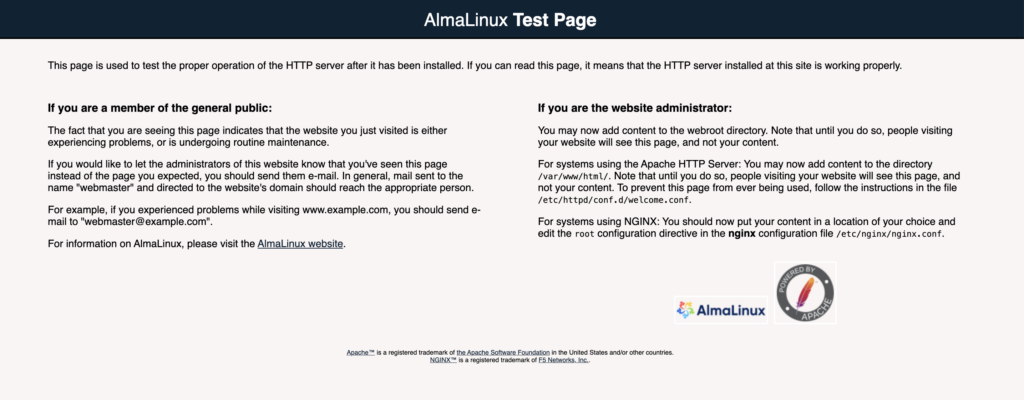
To ensure Apache is installed and running smoothly, open your web browser and enter your server’s IP address or domain. If Apache is installed correctly, you’ll see the default AlmaLinux Apache web page.
Congratulations! You’ve successfully installed Apache on your AlmaLinux system. By following these steps, you’ve set the stage for hosting your websites. Explore further into web server management to unleash the full potential of Apache. Happy web hosting!