As you immerse yourself into the world of blogging, you quickly realize the incredible potential it holds – not just as a platform for sharing your thoughts and ideas, but also as a viable means of generating income by displaying Ad Blocks in WordPress. The importance of monetizing your blog cannot be overstated, and here’s why.
Immersing yourself into the vibrant world of blogging reveals its incredible potential, not just as a platform for sharing thoughts and ideas, but also as a viable means of generating income. Monetizing your blog provides necessary financial support, compensating for the hours spent researching, writing, and editing, as well as the time invested in mastering SEO and social media marketing. This income isn’t merely profit; it’s essential for covering hosting fees, purchasing necessary software, or even securing professional editing services, all contributing to a more polished and successful blog.
The journey doesn’t stop there. Monetizing also opens up exciting opportunities for growth. The funds earned can be reinvested to enhance the blog, be it through a website design upgrade, advertising investments, or hiring talented writers to enrich content. This not only improves the quality and reach of your blog but also paves the way for additional income streams.
A monetized blog also provides an excellent platform to build a community. It empowers you to give back to your readers, be it through giveaways, contests, or exclusive content, fostering a sense of belonging and loyalty among your audience. This community, your tribe, is the backbone of your blog’s long-term success.
Furthermore, as your blog grows and generates income, it solidifies your standing as an authority in your niche. This recognition can lead to a cascade of opportunities, including speaking engagements, book deals, or consulting gigs, each serving as an avenue for further income and enhanced industry profile.
In essence, monetizing your blog is not merely about the financial gains; it’s about elevating your platform to new heights. It provides the means to produce top-notch content for your audience and build a thriving community around your brand. The path may be laden with challenges, but the rewards, both financial and personal, are well worth the pursuit. So, if you’re serious about blogging, embracing the monetization aspect is not just beneficial; it’s integral to your blog’s evolution.
Advertisements play a significant role in blog monetization, providing a direct and often substantial source of income for bloggers. When used effectively, ads can be an integral part of a blog’s revenue stream, helping to sustain and grow the platform.
Picture this: You’re scrolling through a website, and the ad blocks are so seamlessly integrated they feel like a natural part of the content. It’s not an accident; it’s the result of careful and strategic ad blocks placement. And, if you’re wondering how to achieve this on your WordPress blog, look no further than WP Quads. In this guide, we’ll walk you through the process of displaying ad blocks in specific posts using WP Quads.
Step 1: Getting Started with WP Quads
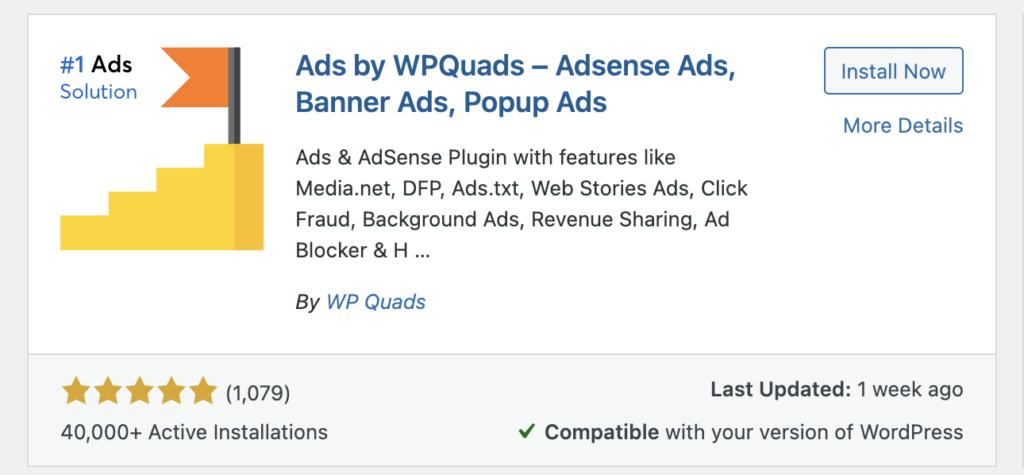
If you haven’t taken the opportunity to install WP Quads on your website yet, let me assure you that the process is remarkably straightforward and hassle-free. Start by navigating to the dashboard of your WordPress website. Once you’re there, you’ll want to direct your attention to the menu located on the left-hand side of the screen and click on the ‘Plugins’ option.
Next, you’ll find an ‘Add New’ button at the top of the page. Go ahead and click on that. Now, in the search bar that appears, type in ‘WP Quads’ and hit enter. A list of plugins will appear, and you should see WP Quads among them. All that’s left to do is click on the ‘Install Now’ button, and WordPress will take care of the rest.
After the installation is complete, you’ll see an ‘Activate’ button in place of the ‘Install Now’ button. Click on it to activate WP Quads on your website. And there you have it! You’re now all set to begin using WP Quads and take advantage of all the wonderful features it has to offer.
Step 2: Configuring WP Quads
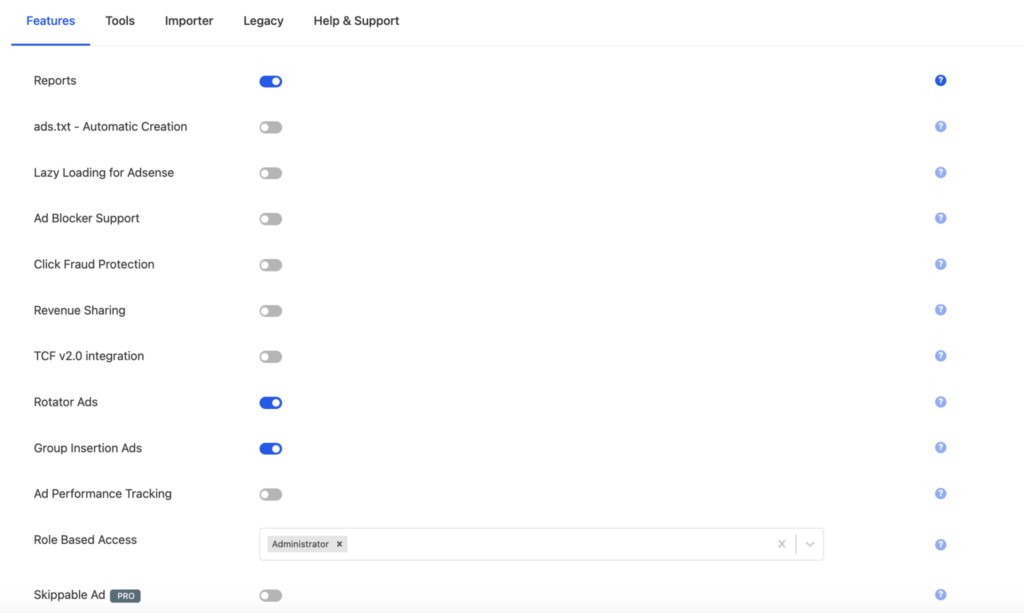
Once WP Quads is fully installed and activated, you’ll see it has made itself a cozy little spot in the sidebar of your WordPress dashboard. It’s like your very own digital butler, waiting patiently to assist you. Now, go ahead and click on the WP Quads option in the sidebar. This will whisk you away to the magical land of WP Quads settings. As you explore this new territory, you’ll find a myriad of options and settings that may seem overwhelming at first, but fear not! These are the tools you’ll be using to craft and manage your ad blocks, ensuring that your website not only looks great but also brings in that much-needed ad revenue.
Take your time to familiarize yourself with the different settings and options available. Each one is there to help you tailor your ad blocks to perfection, making sure they complement your website’s aesthetic while also catching the eye of your potential customers. So, explore, experiment, and have fun! After all, this is your website, and the sky’s the limit when it comes to customization.
Step 3: The Art of Creating Ad Blocks
When you venture into the WP Quads settings, you’ll be greeted with a variety of options. One of the most crucial and exciting sections you’ll find there is ‘Ad & Positions’. Think of this as your personal canvas, a space where your creativity can truly come to life. Whether you’re looking to conjure up a brand new ad from the depths of your imagination or simply wish to fine-tune existing ones to better align with your website’s aesthetic, ‘Ad & Positions’ is the place to do it. This is where you can really take control, ensuring that your ads are not just seen, but resonate and engage with your audience. So, roll up your sleeves, let your creativity flow, and start crafting ad blocks that not only capture attention but also encapsulate the essence of your brand.
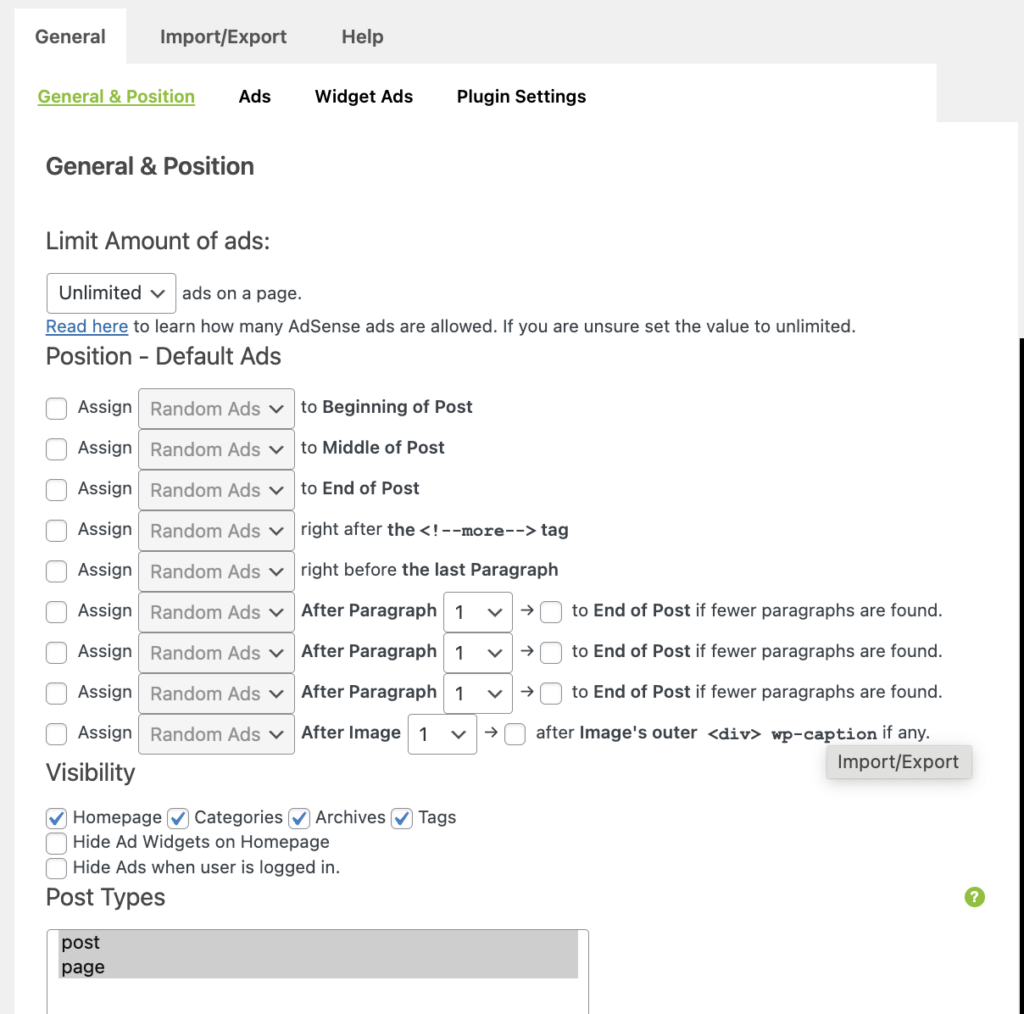
Alright, let’s dive into an example to really help illustrate how this works. Imagine we want to create a Google AdSense ad blocks. The first thing you’d do is navigate to the ‘Create Ad’ button, which will then present you with a few different ad types to choose from. For our purpose, we’re going to select ‘Google AdSense’.
Once you’ve made your selection, you’ll be prompted to input all the necessary information to bring your ad blocks to life. This will include the unique ad code provided by Google AdSense, along with other important details such as the desired size and alignment of your ad. Carefully fill out each field, paying close attention to ensure everything is just right.
After everything is filled out to your satisfaction, go ahead and click the ‘Save’ button. Congratulations, you’ve just created your very own Google AdSense ad! It’s now ready to grace the pages of your website and start capturing the attention of your visitors. Pretty simple, right? Now go on, give it a try!

Type in your advertisement name and complete the fields below.
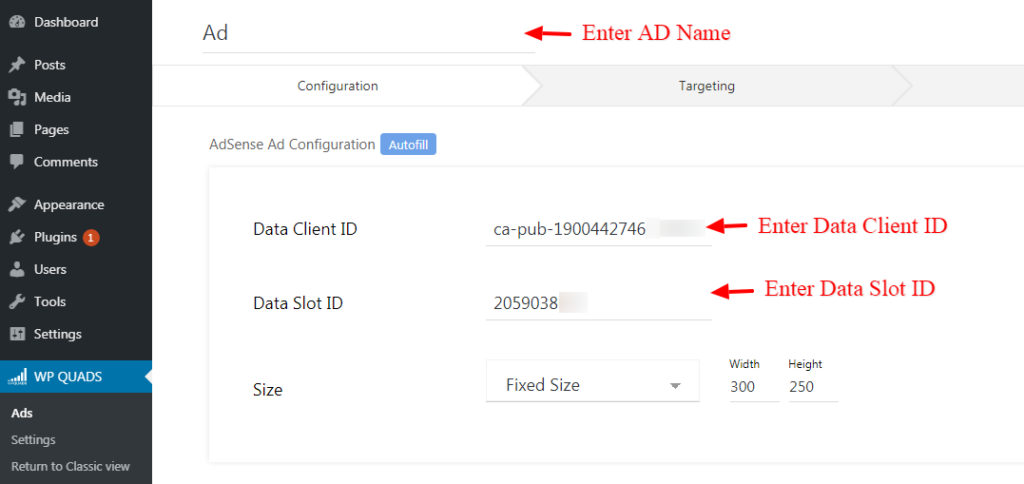
- AD Size: Choose the Ad Size based on what you need.
If you want to add ads in AMP then check “AMP compatibility” option

You can configure label and the position of your Ad
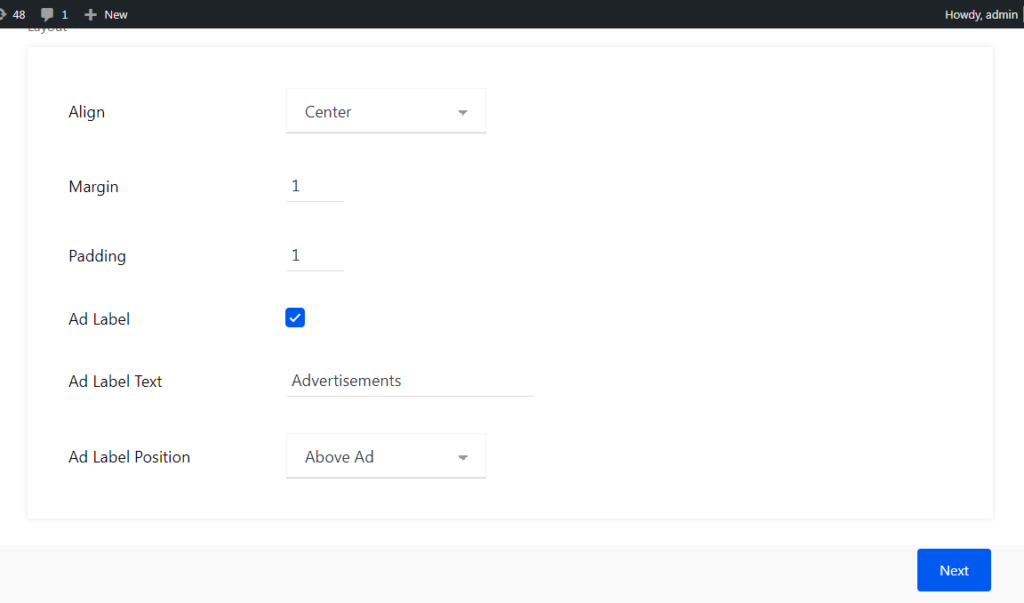
- Align: You can individually adjust the position of the ad label and align it to the left, center or right side inside your layout. The default option uses the position you defined in the general settings
- Margin: You can also set the margins of the ads as per your taste.
- Padding: You can also set the padding of the ads as per your taste.
- Ad Label: You can also add the Ad Label of the ads for this you need to select this option after that you can add a label and the position of your Ad and then click on the “Next” button.
Select where you want to display Ad blocks position as per your requirement.

You need to set the Placement of the Ads whether you want to show the Ads on specific Posts/Pages or all posts, etc.
For example: You must set the placement to “Post type —> To —> Post” if you wish to display the ads only for posts.
Same you can follow this for pages as well “Post type —> To —> Page”
If you want to set the Ad only for Single Page/Post then you need to set like this “Post —> Equals to —> Post name” or “Page—> To —> Page name”
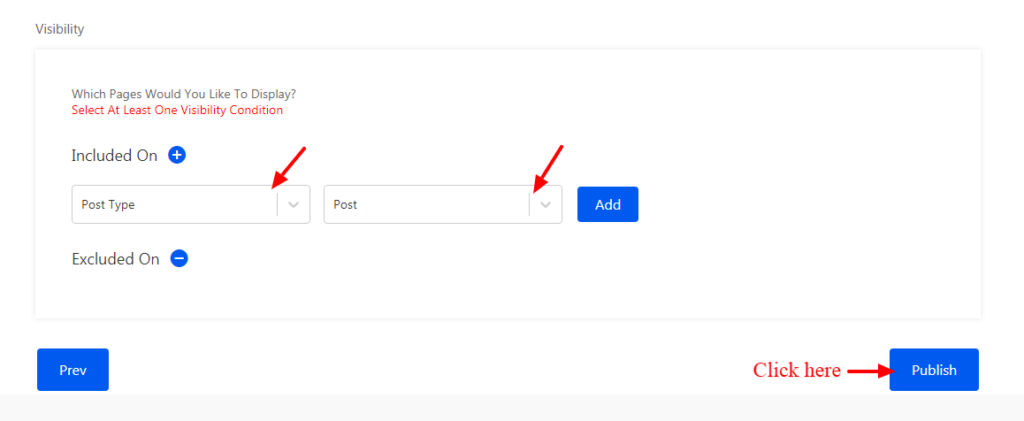
Once you are finished with all the selection and entrees all is left to publish the ad by hitting the publish button then your ad is live on your site.
You’ll see all your ads in Ads’ section.
Summary
And just like that, you’ve mastered the art of strategically placing ad blocks within your posts, striking the perfect balance between enhancing the user experience and optimizing your potential revenue. But remember, the digital landscape is ever-evolving, and what works best is always subject to change. So don’t be afraid to experiment with different placements and types of ads to discover what truly resonates with your audience. Pay close attention to your website’s analytics and user feedback to understand the impact of your ads on visitor engagement and revenue generation. With time, patience, and a willingness to test and learn, you’ll find the sweet spot that meets both your audience’s needs and your revenue goals. So go ahead, get creative and start experimenting today!
