When you’re navigating the digital seas of managing a WordPress site, there’s a notorious storm that many a webmaster has had to weather: the dreaded ‘Fatal Error: Maximum Execution Time Exceeded.’ It’s a common hiccup where WordPress essentially times out because a script has taken too long to run, leaving you with a site that’s as unresponsive as a sunken galleon. This isn’t just a minor annoyance—it’s a full-stop on your website’s functionality, which can be distressing not only for you but for your visitors too.
Imagine your WordPress site as a bustling marketplace. When this Fatal Error: Maximum Execution Time Exceeded error occurs, it’s like the main gate has jammed shut—no one can get in or out, and business grinds to a halt. It’s imperative to get that gate open quickly to welcome your eager patrons back in. That’s why it’s crucial to tackle this issue head-on with the tenacity of a seasoned sailor facing the high winds.
In this guide, we’ll be charting a course through the stormy waters of this Fatal Error: Maximum Execution Time Exceeded error. We’ll explore several lifeboats and life hacks that can help you fix this error, ensuring your site stays afloat and navigable. By the time we’re done, you’ll be ready to hoist the sails once more and catch the trade winds of the internet with a website running smoothly on its voyage through the digital ocean.
What Causes the Maximum Execution Time Exceeded Error?
The “Maximum Execution Time Exceeded” error is essentially a safety mechanism in place that prevents a script from running amok and hogging all the server resources indefinitely. In the bustling world of the web, this is akin to giving each performer on a stage a set amount of time to act. If they take too long, the curtain falls—end of performance. That’s what’s happening here: a script is taking its sweet time, longer than the pre-allotted performance slot, and the server decides to drop the curtain with a Fatal Error: Maximum Execution Time Exceeded error message.
Now, let’s talk about the stage manager behind the scenes: PHP, the scripting language that’s running the show on your WordPress site. PHP scripts are the industrious elves that work tirelessly to serve up your website’s content to visitors. But every server has a timekeeper, a setting in the PHP configuration, typically called max_execution_time, which dictates how many seconds a script is allowed to perform before it’s stopped.
By default, servers are usually set to a conservative execution time—often a mere 30 seconds—to prevent scripts from overloading the server. It’s a bit like having a strict librarian who only allows you a few minutes of reading time to ensure everyone gets a turn. If the server didn’t enforce this, a script could potentially run indefinitely, causing the server to become as sluggish as a snail in a salt mine, affecting all the other websites hosted on the same server.
The role of the server settings is crucial here because they’re the rulebook that the PHP scripts have to play by. If the settings are too restrictive, you might run into Fatal Error: Maximum Execution Time Exceeded error more frequently, especially if you’re using heavy-duty plugins or themes that need more time to do their job, like a complex stage production that needs a few extra minutes to wow the audience.
Method 1: Editing the .htaccess File
Step-by-Step Guide to Edit the .htaccess File:
- Back Up Your .htaccess File: Before you make any changes, it’s crucial to back up your
.htaccessfile. This way, if anything goes wrong, you can restore the original settings. - Access Your Hosting Account: Log in to your hosting account and navigate to the control panel provided by your hosting service. This is typically where you’ll find tools to manage your website’s files.
- Open File Manager: In your control panel, look for the “File Manager” or a similar tool. This is an interface where you can access all the files related to your website.
- Navigate to the Root Directory: Once in File Manager, go to the root directory of your WordPress installation. This is usually called
public_htmlorwwwor named after your domain. - Locate the .htaccess File: In the root directory, find the
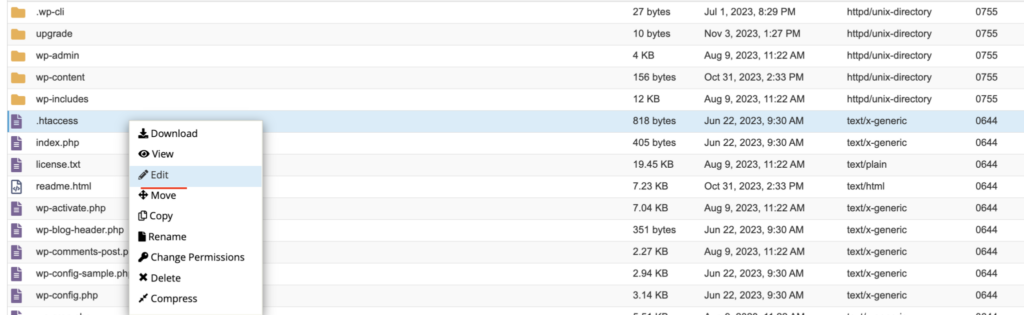
.htaccessfile. If you don’t see it, make sure you have the option to view hidden files enabled, since files starting with a dot (.) are usually hidden by default. - Edit the .htaccess File: Right-click on the
.htaccessfile and select the “Edit” or “Code Edit” option. This will open the file in a text editor within your browser. - Modify Execution Time: Scroll to the end of the file and add the following line to increase the maximum execution time to 60 seconds:
php_value max_execution_time 60 - Save Changes: After adding the line, save the changes and close the editor. If prompted, confirm that you want to save the changes.
- Test Your Website: Visit your website to ensure that it is functioning properly. If the website loads without the Fatal Error: Maximum Execution Time Exceeded error message, the change has been successful.
Implications of Changing the .htaccess Settings:
When you increase the max_execution_time through the .htaccess file, you are essentially allowing each script a longer time to execute before the server terminates it. This can be particularly useful when you’re performing operations that inherently take longer, such as importing large datasets or processing images.
However, extending the execution time is not without its implications. It means that if a script is stuck or poorly written, it will run for a longer period before stopping, which could potentially worsen performance issues or even lead to resource exhaustion, especially on a shared hosting environment. It’s a balancing act between giving your scripts enough time to perform and not overburdening your server resources.
Always monitor your site’s performance after making such changes, and if you notice any issues, you may need to troubleshoot further or revert to the original settings. If you’re frequently running into this Fatal Error: Maximum Execution Time Exceeded error, it could be indicative of a deeper issue, such as inefficient code or inadequate hosting resources, which might require a more robust solution than merely adjusting the execution time.

Method 2: Changing the PHP.ini File
As with the .htaccess method, I’ll guide you through the process of locating and modifying the php.ini file to increase the execution time for your scripts. Remember that the php.ini file is the main configuration file for PHP and changing its settings can have widespread effects on your PHP environment. Be sure to back up the original php.ini before making changes.
Guidance on Locating and Modifying the PHP.ini File:
- Log in to cPanel: Start by logging into your hosting account and accessing cPanel or a similar hosting dashboard provided by your hosting service.
- Find the PHP Configuration Editor: Once logged in, look for the “MultiPHP INI Editor” or “Select PHP Version” tool. The exact name may vary depending on your hosting provider.
- Open PHP Configuration: Within the PHP Configuration tool, you should find an option to edit the
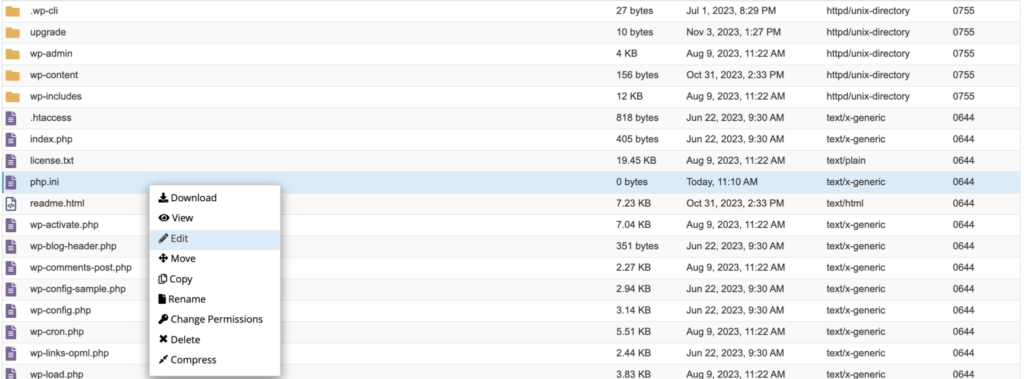
php.inifile. In some hosting environments, you may need to select the option to view or edit thephp.inifile directly. - Locate the php.ini File: In some cases, you might have to use the File Manager within cPanel to locate the
php.inifile manually. It is usually found in the root directory of your website, but if you don’t see it there, it might be in a different folder, or you might need to create a new one. - Edit the php.ini File: If you have access to edit the
php.inifile, look for the line that specifiesmax_execution_time. If it’s not there, you can add it. Change the value to the time in seconds that you want to allow for your script executions:max_execution_time = 60 - Save Changes: After making your changes, save the file. You may need to confirm that you want to save the changes before they take effect.
Explanation of Changes and Their Effect on WordPress:
When you modify the max_execution_time in your php.ini file, you’re instructing the PHP environment to allow scripts a longer maximum time to run before terminating them. This change increases the time limit globally across all PHP scripts running on your server, not just WordPress.
The increase in execution time can help prevent Fatal Error: Maximum Execution Time Exceeded errors during resource-intensive operations, such as updating plugins, themes, or the WordPress core, especially on sites with a large amount of data or complex operations. However, just like adjusting the setting in the .htaccess file, increasing the execution time in php.ini can have downsides. Long-running scripts can tie up server resources and potentially lead to performance degradation, particularly in shared hosting environments.
It’s also important to note that not all hosting providers allow direct access to modify the php.ini file, especially on shared hosting plans. In such cases, you might need to use a .user.ini file, or you might have to reach out to your hosting provider’s support team to make the necessary changes for you. Always proceed with caution and ensure you have backups in case you need to revert your changes.
Method 3: Using a WordPress Plugin
To increase the PHP time limit through a plugin, which is a more user-friendly method compared to editing files directly, you can follow these steps. While I cannot provide an actual screenshot, I’ll give you a descriptive walkthrough that should help you visualize the process:
Using a Plugin to Increase the PHP Time Limit:
- Access Your WordPress Dashboard: Log in to your WordPress admin panel by visiting your website’s login URL, which typically looks like this:
yourdomain.com/wp-admin. - Navigate to Plugins: Once you’re in the dashboard, locate the “Plugins” menu on the left-hand side. Click on “Add New” to begin the process of installing a new plugin.
- Search for a Suitable Plugin: In the “Add New” section, use the search bar to look for a plugin that can increase the PHP time limit. You might search for terms like “increase PHP time limit” or “WP Maximum Execution Time Exceeded.”
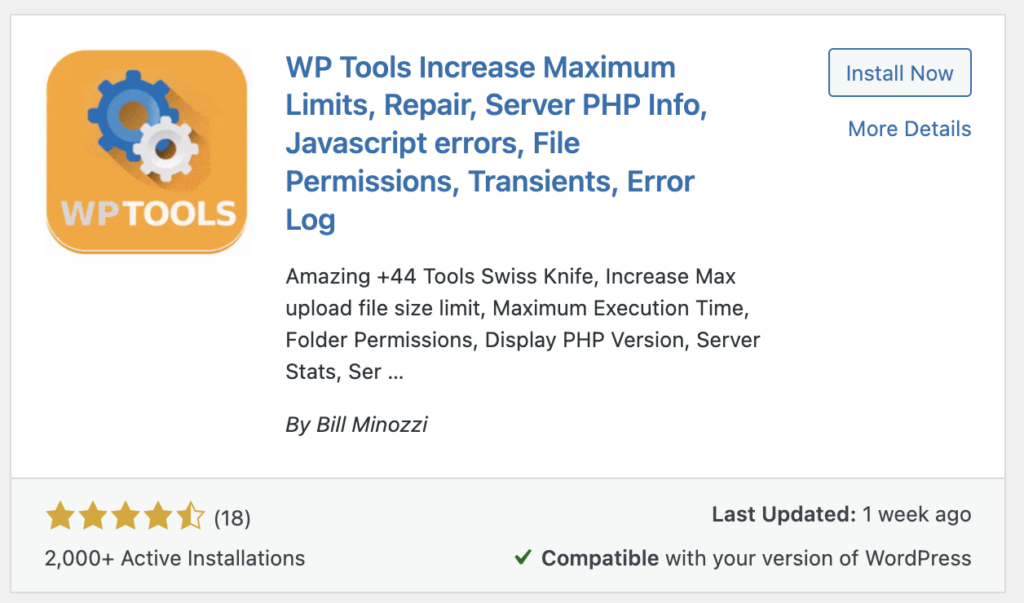
- Install the Plugin: From the search results, choose a plugin that is well-rated and compatible with your version of WordPress. For the purpose of this guide, we could use a plugin named “WP Tools Increase Maximum Limits.” Click “Install Now” on the plugin.
- Activate the Plugin: After the plugin has been installed, you’ll need to activate it. A button will appear in place of the “Install Now” button that says “Activate.” Click it to activate the plugin.
- Configure Plugin Settings: After activation, some plugins will add a new menu item to your dashboard, possibly under “Settings” or “Tools,” or they may have their own dedicated section. Navigate to this location to configure the plugin settings.
- Increase the PHP Time Limit: Look for the option to set the PHP time limit within the plugin’s settings. Here you can input the desired time. For example, you could set it to 60 seconds. The plugin interface should provide a simple input field or dropdown where you can make this change.
- Save Changes: After setting the new time limit, make sure to save your changes. The plugin should now apply the new maximum execution time to your site.
- Test Your Website: As always, after making changes, visit your website to make sure everything is operating smoothly and that the Fatal Error: Maximum Execution Time Exceeded error has been resolved.
Implications of Using a Plugin:
Using a plugin to increase the PHP time limit is a convenient option for those who are not comfortable editing files or do not have access to do so due to hosting restrictions. It abstracts away the complexities and often provides a simple interface to make the change.
However, keep in mind that installing numerous plugins can slow down your site and create potential security vulnerabilities. Always keep your plugins updated and delete those that are not in use. Furthermore, while a plugin can set the execution time limit, the server’s settings ultimately take precedence. If the server has hard limits, a plugin may not be able to override them. Therefore, even after setting the plugin, if the Fatal Error: Maximum Execution Time Exceeded error persists, you may need to contact your hosting provider to resolve the issue.
Lastly, it’s also worth noting that not all plugins will work with all hosting environments due to different configurations and restrictions. If one plugin does not work, you might need to try another, or revert to one of the manual methods mentioned earlier.
Method 4: Modifying the wp-config.php File
Safely Editing the wp-config.php File:
- Backup Your wp-config.php File: Before making any changes, it’s crucial to create a backup of your
wp-config.phpfile. This file contains important settings for your WordPress site and is not one to be edited lightly. - Access Your Hosting Account: Log into your web hosting account and open the control panel where you can manage your website’s files.
- Open File Manager: Within your hosting control panel, locate and open the File Manager. This tool allows you to edit, delete, and manage all files related to your website.
- Navigate to Your WordPress Root Directory: In File Manager, go to the directory where WordPress is installed, which is typically the
public_htmlfolder or a subfolder within it. - Locate the wp-config.php File: Find the
wp-config.phpfile in the list of files. This file usually resides in the root directory of your WordPress installation. - Edit the wp-config.php File: Right-click on the
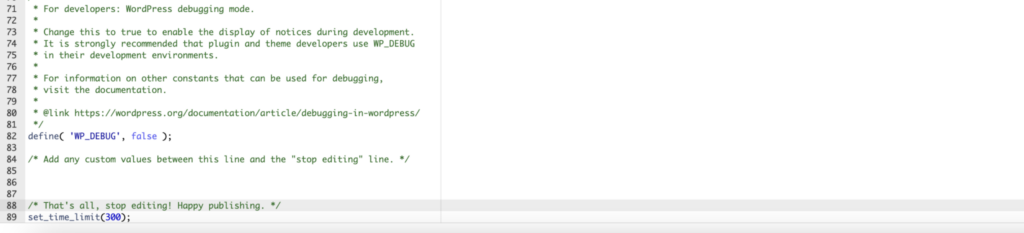
wp-config.phpfile and select ‘Edit’ or ‘Code Edit’ from the menu to open the file in a text editor within your browser. - Insert the Code Snippet: In the editor, scroll to the bottom of the file, just before the line that says /* That’s all, stop editing! Happy blogging. */. Here, insert the following line of code:
set_time_limit(300);This line of code instructs PHP to allow a script to run for a maximum of 300 seconds before it is terminated. - Save Changes: After inserting the code, save the changes by clicking ‘Save’ or ‘Save Changes’ in the editor.
- Test Your Site: After saving the file, visit your site to make sure that everything is working correctly. The change should now be active, and your site should no longer hit the previous time limit.
When and Why to Use This Method:
The set_time_limit() function in PHP overrides the default time limit set in the PHP configuration. Editing the wp-config.php file to include this line is a quick and direct way to extend the maximum execution time for scripts on your WordPress site. This method is particularly useful when you do not have access to the php.ini file or when other methods like the .htaccess file edit are not permitted by your hosting environment.
You might use this method when your site requires lengthy operations that cannot be completed within the default time limit, such as importing a large number of posts, performing extensive database operations, or running complex background tasks.
However, use this method with caution. Extending the execution time can put more strain on server resources, and if used inappropriately, can lead to performance issues, especially on shared hosting. This method should only be used as a temporary fix or when you are sure that the operation causing the timeout is safe and necessary. If you find yourself needing to use this method often, it may be a sign that you need to optimize your scripts or upgrade your hosting solution to accommodate your site’s needs.
Preventing Future Errors
Preventing future “Maximum Execution Time Exceeded” errors involves a combination of good coding practices, diligent plugin management, and proactive server resource monitoring. Here’s how you can keep your WordPress site running smoothly:
Coding Practices:
- Optimize Code: Write efficient code with optimized queries. If you’re not a developer, hire someone who understands how to profile and optimize PHP code.
- Use Caching: Implement caching mechanisms to reduce the load on your server and speed up page delivery.
- Batch Process Large Tasks: If you have tasks that require a lot of processing power, try to break them down into smaller jobs that can be processed in a loop over time, rather than all at once.
Plugin Management:
- Keep Plugins Updated: Regularly update your plugins to ensure you have the latest performance improvements and fixes.
- Audit Plugins: Periodically review the plugins you have installed and deactivate or delete any that are unnecessary, as they can slow down your site and increase load times.
- Choose Quality Plugins: Select plugins that have good reviews, are regularly updated, and are known for quality coding. Poorly coded plugins can drain server resources quickly.
Monitoring Server Resources:
- Use Monitoring Tools: Employ tools to monitor your server’s resource usage so you can identify and respond to issues before they cause Fatal Error: Maximum Execution Time Exceeded errors.
- Upgrade Hosting if Necessary: If you consistently hit resource limits, it might be time to upgrade your hosting plan. Shared hosting is economical, but a virtual private server (VPS) or dedicated server can offer more resources for demanding sites.
Regular Maintenance:
- Database Optimization: Regularly clean and optimize your WordPress database to remove bloat a schedule for regular site backups. This ensures that if something does go wrong, you can restore your site to a functioning state.
- Scheduled Backups:
- Automate Backups: Use a reliable backup plugin or your hosting provider’s service to automate the backup process. Store backups in a secure, off-site location.
- Test Backup Restoration: Periodically test your backups by restoring them to a separate test environment to ensure they work.
Summary
In conclusion, we’ve navigated several methods to resolve the “Maximum Execution Time Exceeded” error in WordPress. From the direct approach of editing files like .htaccess, php.ini, or wp-config.php to increase the time limit, to the more user-friendly option of using a plugin, these solutions are tailored to suit different levels of access and technical comfort.
By implementing these fixes, you can alleviate the immediate issue at hand. However, it’s essential to not stop there. Adopting good coding practices, managing your plugins wisely, and monitoring your server resources can help prevent the recurrence of this Fatal Error: Maximum Execution Time Exceeded error. Regular maintenance of your WordPress site and testing in staging environments before going live with changes will also play a crucial role in maintaining the health of your site.
I encourage you to take action now. Whether it’s by applying one of the direct fixes, tweaking your website’s configuration for optimization, or reaching out to your hosting provider for assistance, addressing the “Maximum Execution Time Exceeded” error is vital for the smooth operation of your WordPress site. By being proactive and attentive to your website’s needs, you can ensure a seamless experience for both yourself as an administrator and for your valued site visitors.