Encountering the elusive 500 Internal Server Error within your WordPress website can be a perplexing experience, leaving many site owners scratching their heads in search of a solution. This enigmatic error, devoid of specific information, has earned a reputation as one of the most prevalent WordPress errors, particularly confounding for those new to the intricate world of website management.
In this comprehensive guide, we embark on a journey to demystify the 500 Internal Server Error, equipping you with the knowledge and step-by-step instructions necessary to navigate through the intricacies of resolving this common WordPress conundrum. Beyond the surface-level frustration that arises from the lack of explicit error details, we delve into the underlying causes and unveil a series of pragmatic solutions to restore your website’s functionality seamlessly.
Unraveling the 500 Internal Server Error:
The 500 Internal Server Error, often shrouded in mystery, can manifest for a variety of reasons within the intricate framework of your WordPress site. It serves as a generic indication that something has gone awry on the server side, without divulging the specific nature of the issue. This ambiguity, while vexing, prompts a methodical exploration into potential culprits and solutions.
Navigating the Troubleshooting Landscape:
1. Check .htaccess File:
Begin your troubleshooting expedition by scrutinizing the .htaccess file, a critical component governing your site’s configuration. A misconfigured or corrupted .htaccess file can be a silent instigator of the Internal Server Error. By navigating to your site’s root directory and temporarily renaming the .htaccess file, you initiate a diagnostic process that may unearth the root cause.

2. Increase PHP Memory Limit:
The Internal Server Error can also stem from inadequate PHP memory allocation. Tackle this by delicately adjusting the PHP memory limit within the wp-config.php file. This strategic modification aims to ensure that your WordPress site operates with an ample memory reserve, mitigating the risk of encountering the error.
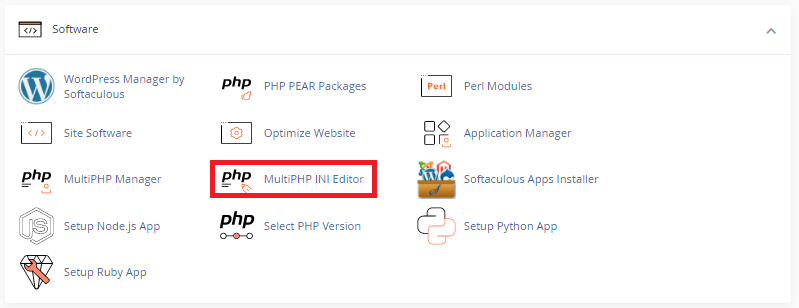
Once you’re logged in to your cPanel account, navigate to the “MultiPHP INI Editor” option. This option can usually be found under the “Software” section of cPanel.
Once you’re on the “MultiPHP INI Editor” page, you will see a list of all the domains associated with your cPanel account. To select the domain you want to modify PHP values for, simply locate the domain in the list.
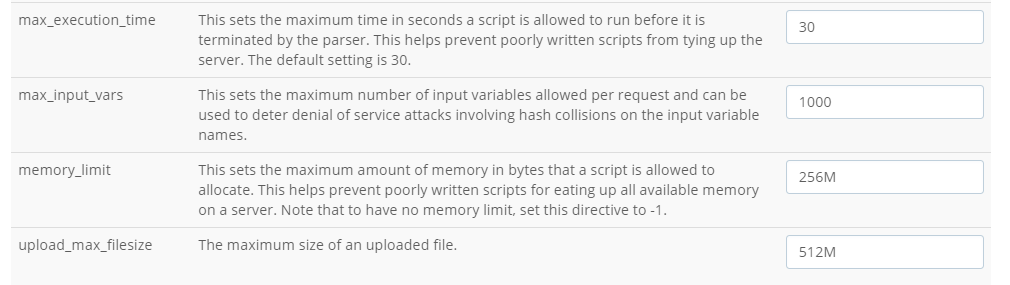
After you choose the domain it will display various PHP settings that you can modify, such as memory_limit, post_max_size, upload_max_filesize, and max_execution_time.
3. Check for Plugin Conflicts:
Plugins, integral to the functionality and features of your WordPress site, can occasionally clash and instigate the Internal Server Error. A systematic deactivation and reactivation of plugins, coupled with a vigilant observation of the error’s persistence, serves as an effective method to identify the culprit among the multitude of plugins. Follow the instructions in our guide on how to deactivate all WordPress plugins without WP-Admin.
- Connect to your site using an FTP client.
- Navigate to the
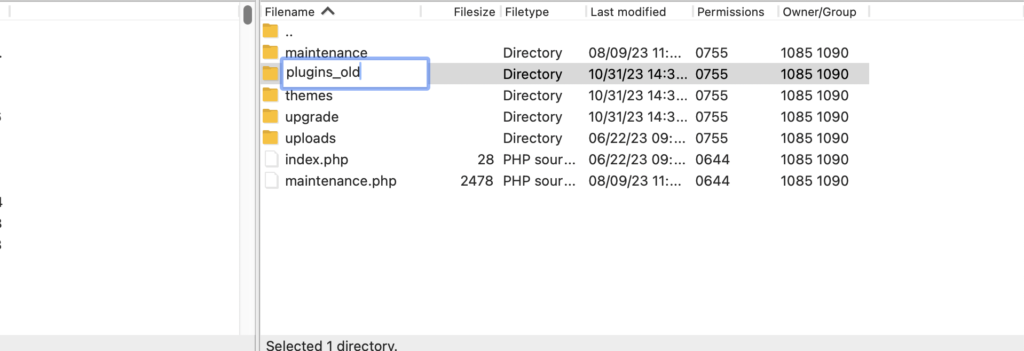
wp-contentdirectory. - Find the
pluginsfolder and rename it to something likeplugins_oldorplugins_deactivate. This will deactivate all plugins at once.
4. Switch to a Default Theme:
Themes, the aesthetic backbone of your website, may harbor elements contributing to the Internal Server Error. Temporarily switching to a default WordPress theme aids in isolating theme-related issues, allowing you to discern whether the error persists in the absence of your active theme.
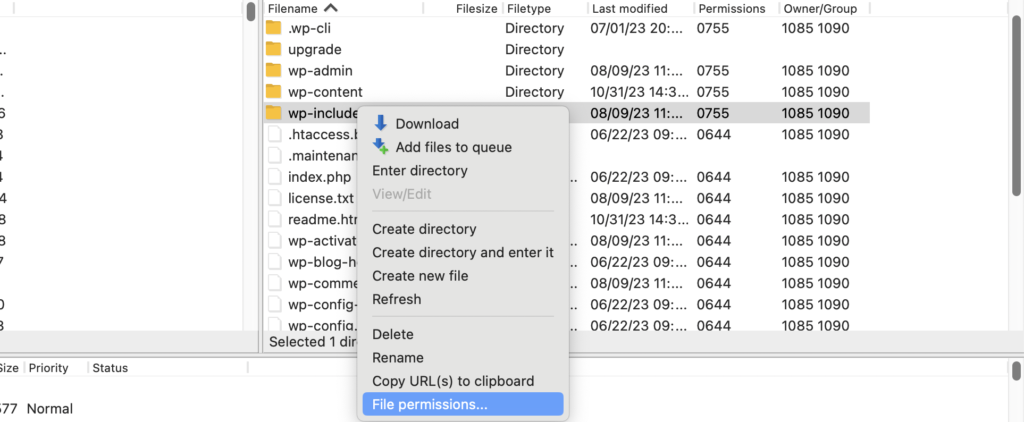
5. Check File Permissions:
Delve into the intricacies of file permissions, a critical yet often overlooked aspect of WordPress site management. Incorrect file permissions can pave the way for the Internal Server Error. By meticulously adjusting permissions for files and directories, you fortify your site’s structural integrity against potential disruptions.
- Connect to your site using an FTP client like FileZilla.
- Navigate to the root directory of your WordPress installation.
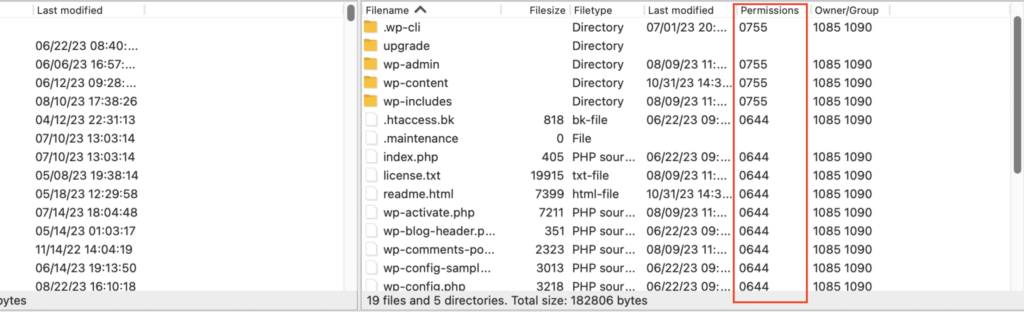
- Right-click on a file or directory and select ‘File permissions…’ to view the numeric value representing the current permissions.
If you find that permissions are set incorrectly, here’s how to change them:
- For Directories:
- Right-click on the directory and choose ‘File permissions…’.
- In the numeric value field, enter 755 to set the permissions.
- To apply these permissions to all subdirectories, check the option ‘Recurse into subdirectories’ and select ‘Apply to directories only’.
- Click ‘OK’ to set the permissions.
- For Files:
- Right-click on a file and select ‘File permissions…’.
- Enter 644 in the numeric value field to change the file permissions.
- To change the permissions for all files within a directory, choose ‘Recurse into subdirectories’ and ‘Apply to files only’.
- Click ‘OK’ to apply the changes.
6. Re-upload Core Files
In instances where the Internal Server Error persists despite the aforementioned steps, consider re-uploading core WordPress files. Access the official WordPress website, download the latest version, and overwrite your existing core files. This ensures that any corrupted or missing files are seamlessly replaced, potentially resolving the error.
The Human Touch:
Beyond the technical nuances, grappling with the 500 Internal Server Error demands a human-centric approach, acknowledging the frustrations that accompany such occurrences. Each step in this guide serves as a testament to the collaborative effort between website owners and the intricate machinery that powers their online presence.
The Quest for Resolution:
In the event that the aforementioned steps yield no respite, it is prudent to delve into server logs, invaluable repositories of information that can illuminate the path toward resolution. By investigating server logs accessible through cPanel or FTP, you glean insights that transcend the cryptic nature of the error.