
Introduction:
Redis Cluster might seem complex, but fear not! This step-by-step tutorial is designed for beginners, guiding you through deploying Redis Cluster on Kubernetes using Helm. Follow along, and soon you’ll be harnessing the power of distributed data storage effortlessly.
Prerequisites:
Before diving in, make sure you have Helm and Kubernetes installed on your system. If not, follow our K3s installation guide.
Understanding Redis Cluster:
Redis Cluster is a distributed and scalable version of Redis, providing high availability and partition tolerance. Helm, a Kubernetes package manager, simplifies the deployment process, making it accessible for beginners.
Step 1: Adding Bitnami Repository to Helm:
Let’s kick things off by adding the Bitnami Helm repository, your gateway to a plethora of pre-packaged applications:
helm repo add bitnami https://charts.bitnami.com/bitnami
helm repo update
Step 2: Deploying Redis Cluster with Helm from OCI Registry:
Harness the power of Helm and the OCI Registry to deploy Redis Cluster effortlessly:
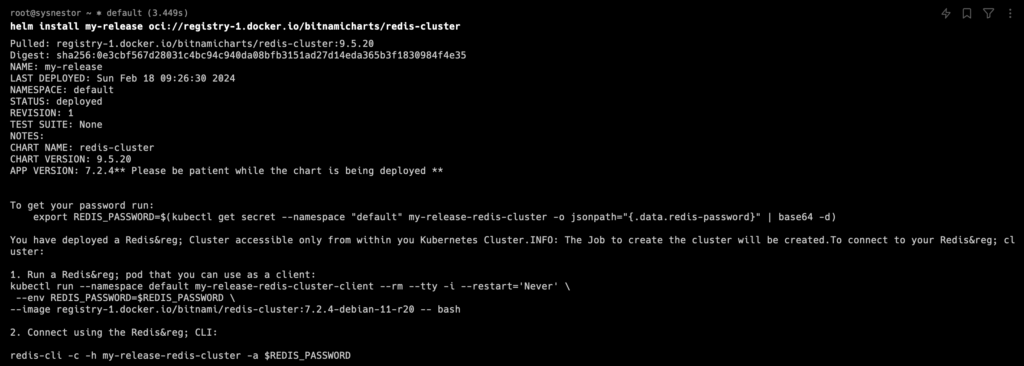
helm install my-release oci://registry-1.docker.io/bitnamicharts/redis-cluster
Step 3: Monitoring Deployment Progress:
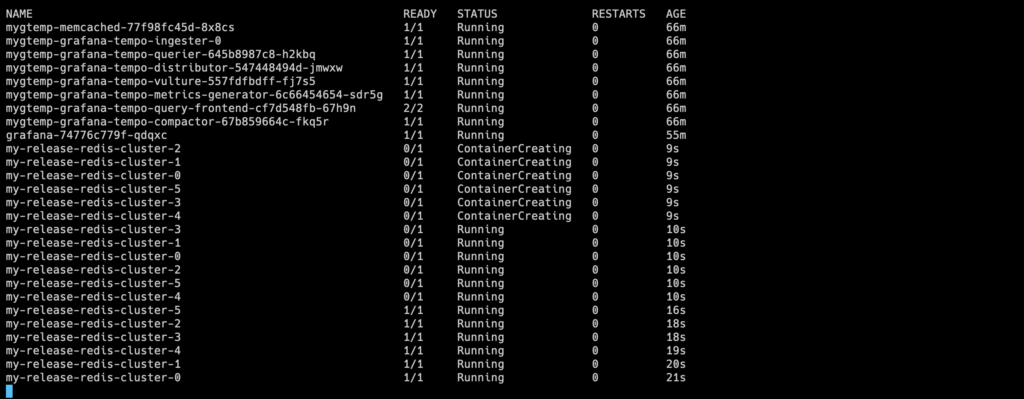
Stay informed about the deployment status with:
kubectl get pods -w
Step 4: Accessing Your Redis® Cluster:
Upon deployment completion, access your Redis Cluster through the provided service. Retrieve the port using:
kubectl get svc my-release-redis-cluster -o jsonpath='{.status.loadBalancer.ingress[0].ip}:{.spec.ports[0].port}'Step 5: Interacting with Redis Cluster:
Ready to dive into interaction? Utilize the Redis command-line interface for seamless communication:
Install the Redis Tools:
apt install redis-tools
To access the Redis® Cluster from your local machine, you can set up port forwarding to one of the Redis® Cluster pods. Here’s how you can do it:
kubectl port-forward svc/my-release-redis-cluster 6379:6379 &This command forwards your local port 6379 to the Redis® Cluster service port 6379. After running this command, you should be able to connect to the Redis® Cluster using redis-cli on your local machine.
Access the secret to retrieve the password:
kubectl get secret my-release-redis-cluster -o jsonpath='{.data.redis-password}' | base64 --decodeOpen a new terminal window and run:
redis-cli -c -h 127.0.0.1 -p 6379This should connect you to the Redis Cluster. Make sure to keep the port-forwarding terminal open while you are working with Redis®.
Authenticate with Password: If your Redis® Cluster is password-protected, you need to provide the password using the AUTH command. Replace <your-password> with your actual Redis® password:
127.0.0.1:6379> AUTH <your-password>Run CLUSTER NODES after Authentication: After successfully authenticating, you can run the CLUSTER NODES command:
127.0.0.1:6379> CLUSTER NODES
You’ve conquered Redis Cluster deployment! This guide, tailored for beginners, has demystified the process. Feel free to explore advanced configurations and unleash the full potential of Redis Cluster in your Kubernetes environment.
