Grafana Tempo stands out as an exceptional distributed tracing system. This guide aims to provide a detailed walkthrough on how to install Grafana Tempo on Kubernetes, emphasizing the use of the lightweight K3s distribution. Additionally, we’ll leverage Helm to streamline the installation process, pulling the Grafana Tempo Helm chart from the OCI registry.
Section 1: Prerequisites
Before embarking on the installation journey, make sure you have the following prerequisites in place:
1. Kubernetes Cluster:
Ensure you have a functional Kubernetes cluster available. If you don’t have one set up, consider using K3s, a lightweight Kubernetes distribution designed for simplicity and resource efficiency, follow our K3s installation guide.
2. Helm Installed:
Helm is the package manager for Kubernetes. Install Helm on your local machine using the following commands:
# Download Helm binary
curl -fsSL -o get_helm.sh https://raw.githubusercontent.com/helm/helm/master/scripts/get-helm-3

# Install Helm
chmod +x get_helm.sh
./get_helm.sh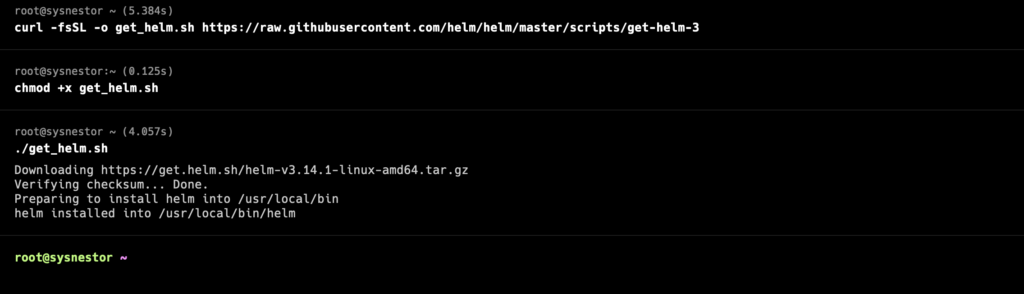
Verify the installation:
helm version
version.BuildInfo{Version:"v3.14.1", GitCommit:"e8858f8696b144ee7c533bd9d49a353ee6c4b98d", GitTreeState:"clean", GoVersion:"go1.21.7"}
Section 2: Understanding Grafana Tempo
What is Grafana Tempo?
Grafana Tempo is an open-source distributed tracing system designed for cloud-native applications. It enables developers to gain valuable insights into the performance and interactions of their microservices. Grafana Tempo represents a sophisticated distributed tracing infrastructure, seamlessly integrating with Grafana right out of the box. Renowned for its remarkable scalability, this system effortlessly accommodates a myriad of widely used tracing protocols, making it an ideal choice for organizations seeking an advanced solution in the realm of distributed tracing.
Why Choose Grafana Tempo?
Grafana Tempo offers several advantages, including minimal resource requirements and seamless integration with Grafana for comprehensive monitoring capabilities.
Section 4: Deploying Grafana Tempo on Kubernetes with K3s
Helm Chart Installation from OCI Registry
Use the following commands to deploy Grafana Tempo using Helm and the OCI registry:
# Add Grafana Helm repository
helm repo add grafana https://grafana.github.io/helm-charts

# Update Helm repositories
helm repo update

# Install Grafana Tempo from OCI registry
helm install gtempo oci://registry-1.docker.io/bitnamicharts/grafana-tempo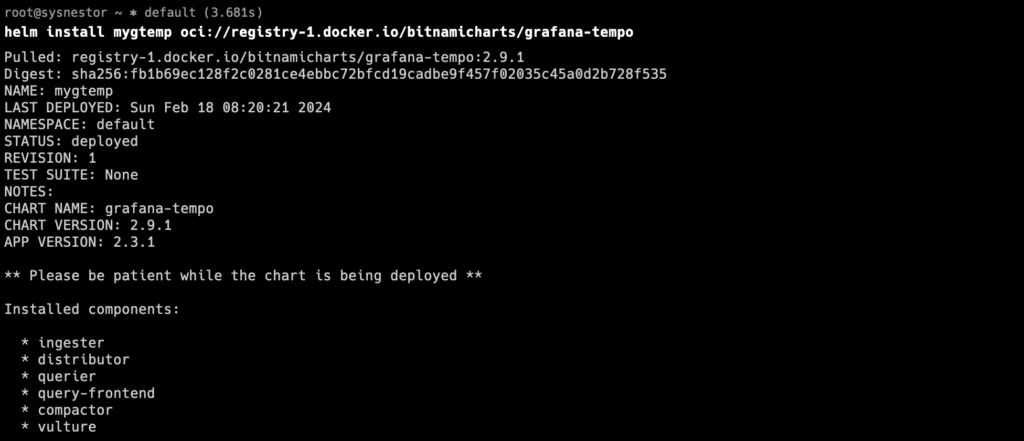
This installs Grafana Tempo with default configurations. Customize the installation as needed.
Integrating Grafana for Visualization
Deploy Grafana for visualization:
helm install grafana grafana/grafana --set persistence.enabled=true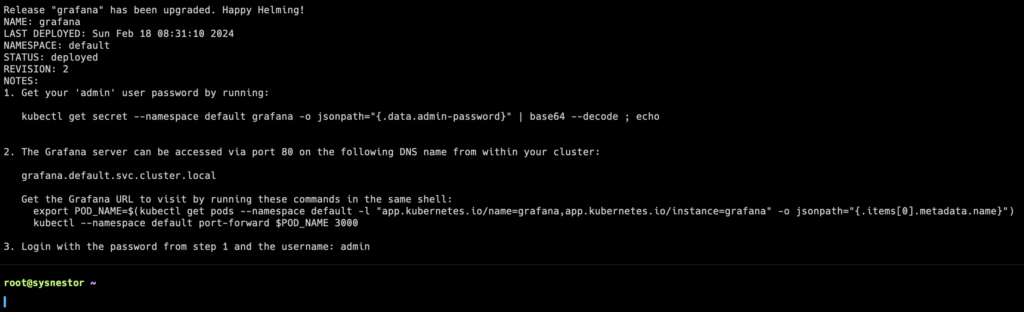
Access Grafana:
Follow the instructions provided earlier to access Grafana. You’ll need the admin password obtained from the secret.
kubectl get secret --namespace default grafana -o jsonpath="{.data.admin-password}" | base64 --decode ; echo
Use the port-forwarding command to access Grafana in your local browser:
export POD_NAME=$(kubectl get pods --namespace default -l "app.kubernetes.io/name=grafana,app.kubernetes.io/instance=grafana" -o jsonpath="{.items[0].metadata.name}")
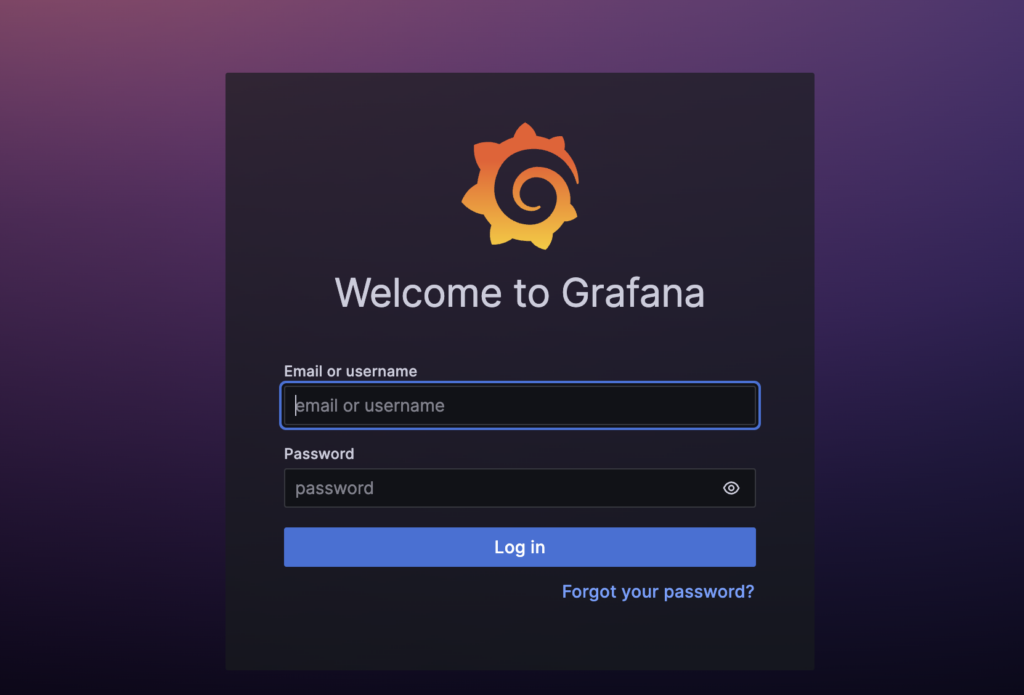
kubectl --namespace default port-forward $POD_NAME 3000Visit http://localhost:3000 in your web browser, and log in with the admin username and password.
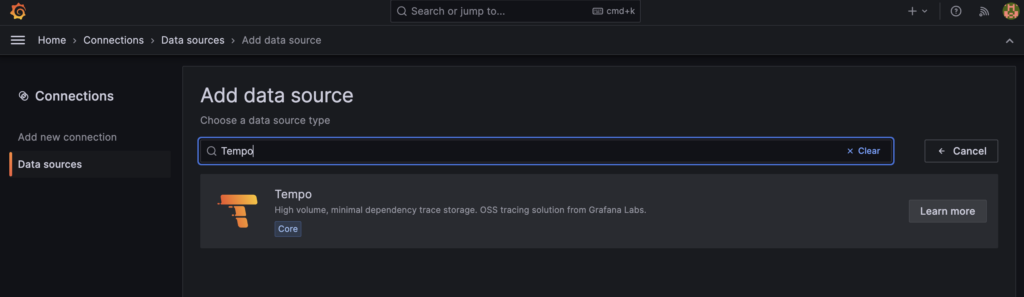
Add Tempo as a Data Source:
Once you are logged in to Grafana, follow these steps to add Tempo as a data source:
- Select “Data Sources” from the menu.
- Click on the “Add your first data source” button or the “+ Add your first data source” link.
- Search for “Tempo” in the “Plugins” section and click on “Tempo Datasource” to select it.
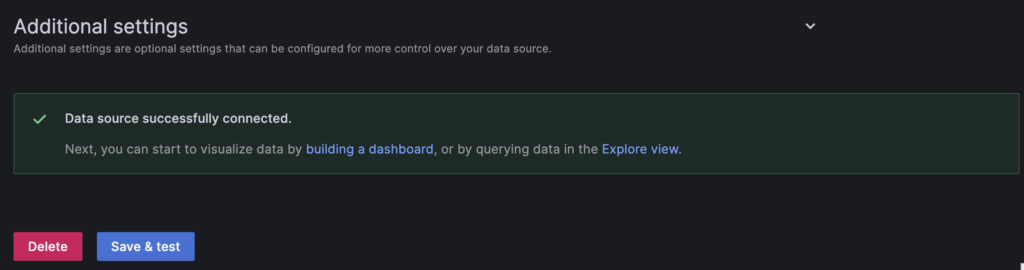
- Configure the Tempo data source settings:
- HTTP URL: Set this to the URL of your Tempo instance. For local setups, it might be something like
http://mygtemp-grafana-tempo-query-frontend-headless:3200. - HTTP Access: Select “direct” unless you have a specific reason to use a proxy.
- Timeout: Set a reasonable timeout value, for example,
10s. - Click “Save & Test” to verify the connection.
- HTTP URL: Set this to the URL of your Tempo instance. For local setups, it might be something like
- Once the connection is successful, you can start using Tempo as a data source in Grafana for your traces.
These steps should help you integrate Tempo as a data source in Grafana. Adjust the Tempo URL and settings based on your specific deployment. If you encounter any issues or have further questions, feel free to ask!