

Whether you’re a web developer, blogger, or businessperson, your top priority should be to make sure that no one can access the data on your website. This article will show you how to back up WordPress website to Dropbox using the Duplicator plugin in a quick, easy, and secure manner.
The Importance of a Backup
Let’s first explore the importance of backing up your WordPress site before getting into the specifics. Numerous threats, such as server failures, hacking attempts, and even simple human error, can affect websites. A backup serves as a safety net in these scenarios, enabling you to return your website to its prior state. Dropbox is a great option for storing these backups due to its powerful cloud storage capabilities.
Why Choose the Duplicator Plugin?
WordPress provides a variety of website backup plugins, but Duplicator stands out for its effectiveness and simplicity. You can clone, back up WordPress, move, and transfer an entire site from one place to another using Duplicator. It is a great tool for Dropbox back up WordPress sites.
Getting Started: Installing the Duplicator Plugin
To begin, you need to install the Duplicator plugin on your WordPress site. Follow these steps:
- Login to your WordPress dashboard.
- Navigate to ‘Plugins’ > ‘Add New’.
- In the search bar, type ‘Duplicator’ and press enter.
- Click ‘Install Now’.
- After installation, click ‘Activate’.
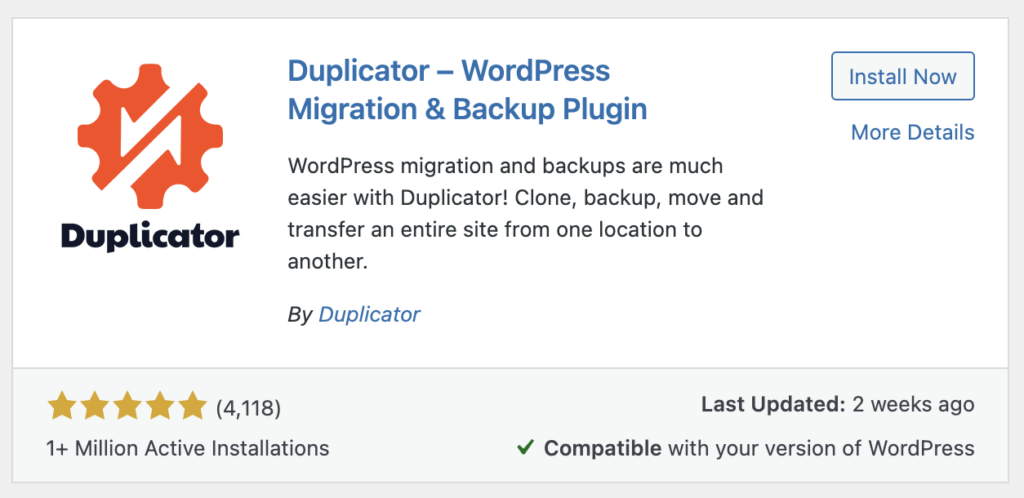
Now, the Duplicator plugin is installed and ready to back up WordPress site.
How to Back up WordPress Site to Dropbox
After installing the plugin, follow these steps to create a new backup:
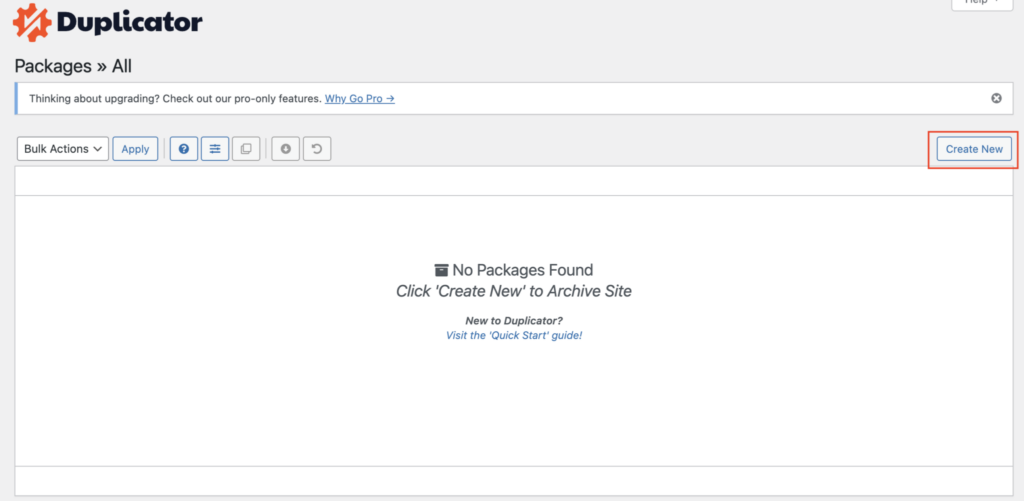
- On your WordPress dashboard, go to ‘Duplicator’ > ‘Packages’.
- Click on the ‘Create New’ button at the top right corner.
- On the ‘Setup’ page, you can give your backup a name or leave it as the default.
- Click ‘Next’, and the plugin will scan your website. If the scan is successful, click ‘Build’. The process may take some time, depending on the size of your site.
- Once the build process is complete, you will see ‘Installer’ and ‘Archive’ files. These are your backup files.
Setting up Dropbox as the Storage Location
The next step is to set up Dropbox as the storage location for your backups. Follow these steps:
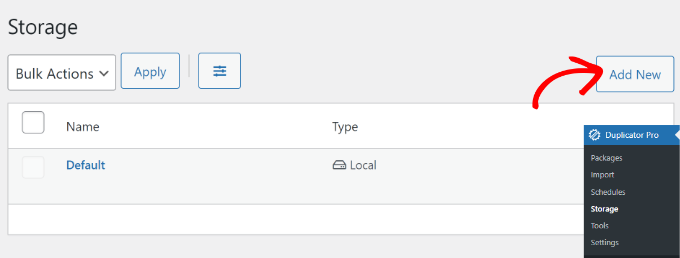
- On your WordPress dashboard, go to ‘Duplicator’ > ‘Settings’.
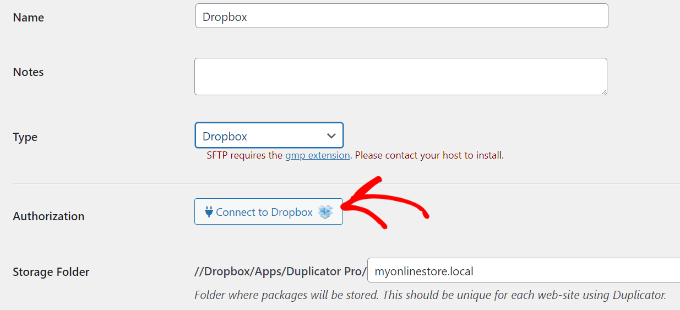
- Click on the ‘Storage’ tab and then click ‘Add New’.
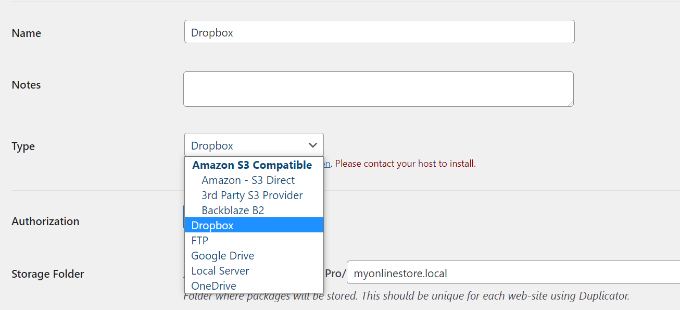
- Give your storage a name (e.g., ‘Dropbox Backup’).
- From the ‘Type’ dropdown menu, select ‘Dropbox’.
- You will see a ‘Connect to Dropbox’ button. Click on it and follow the prompts to authorize Duplicator to access your Dropbox account.
- Once authorized, click ‘Save Storage’.
Linking Your Backup to Dropbox
Now that Dropbox is set up as your storage location, you need to link your backup to Dropbox. Follow these steps:
- Go to ‘Duplicator’ > ‘Packages’.
- Click on the ‘Create New’ button.
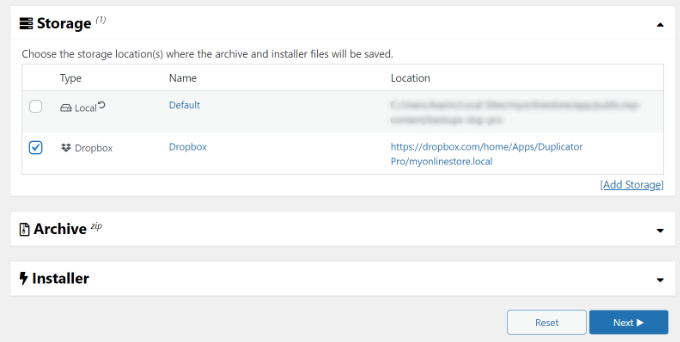
- On the ‘Setup’ page, under the ‘Storage’ section, you will see your Dropbox storage. Check the box next to it.
- Click ‘Next’ and proceed as before to create your backup.
Restoring Your Website from a Backup
In case of a mishap, you can restore your website from the backup stored in Dropbox. Here’s how:
- Download the ‘Installer’ and ‘Archive’ files from Dropbox.
- Upload these files to your website’s root directory using an FTP client.
- Open a new browser tab and navigate to ‘http://yourwebsite.com/installer.php‘. Replace ‘yourwebsite.com’ with your actual domain name.
- Follow the prompts to restore your website.
Summary
It’s simple to use the Duplicator plugin to back up WordPress website to Dropbox. You can guarantee the security of the data on your website by following these instructions. Keep in mind that routine backups are an essential component of website maintenance. You can set up a dependable backup system that gives you peace of mind using Duplicator and Dropbox.
Keep in mind that technology is a tool for our benefit. Using the Duplicator plugin to back up WordPress site to Dropbox has been thoroughly covered in this guide, but it’s important to stay current on the most recent innovations and industry best practices in the field of digital data security. Keep discovering, keep learning, and safeguard the information on your website.
