George Bicu
Infrastructure and Operations Specialist
I specialize in infrastructure automation and system optimization, creating scalable solutions for modern web applications. With expertise in Linux systems, virtualization, and containerization, I build robust environments that prioritize reliability and efficiency.
About Me
I'm an Infrastructure and Operations Specialist with a strong focus on automation and system optimization. My expertise spans a diverse range of technologies, with a particular emphasis on creating efficient, reliable infrastructure solutions.
Throughout my career, I've developed a passion for optimizing web hosting environments, securing Linux systems, and implementing containerization strategies that enhance scalability and resource management. I believe that well-designed infrastructure is the foundation of exceptional digital experiences.
When I'm not fine-tuning systems or automating workflows, I share my insights and experiences on my technical blog at blog.networkwhois.com, where I discuss infrastructure challenges, emerging technologies, and best practices in system administration.
Professional Skills
Infrastructure
- Web HostingRobust hosting environments, performance optimization
- Linux SystemsAdministration, security, performance tuning
- VirtualizationVMware, KVM, resource optimization
- Cloud ServicesAWS, DigitalOcean, Hetzner
- Network ManagementFirewalls, VPNs, Load Balancing
Containerization
- DockerContainer deployment, image optimization
- KubernetesOrchestration, scaling, deployment strategies
- Container SecurityVulnerability scanning, security best practices
- Microservices ArchitectureDesign, implementation, optimization
- HelmPackage management for Kubernetes
Automation & DevOps
- Infrastructure as CodeTerraform, Ansible, configuration management
- CI/CD PipelinesJenkins, GitHub Actions, automated deployment
- Monitoring & LoggingPrometheus, Grafana, ELK Stack
- Shell ScriptingBash, Python, task automation
- System OptimizationPerformance tuning, resource allocation
Featured Projects

IP Blacklist Checker
A comprehensive tool for checking IP addresses against multiple blacklist databases. Helps system administrators ensure email deliverability and maintain network reputation.
NetworkWhois.com
A comprehensive toolkit for network diagnostics, security analysis, and text manipulation. Features 25+ professional-grade utilities including Whois IP, DNS tools, security scanners, and more.

Bash Autoinstallers
A collection of bash scripts that automate the installation and configuration of popular applications like WordPress, Nextcloud, and more. Designed to simplify server setup and reduce manual configuration time.

GatesteAzi.ro - Recipe Website
A comprehensive Romanian recipe website offering delicious culinary recipes with step-by-step instructions. Features various cuisine categories including Romanian, Mediterranean, Asian, Mexican, and vegan options.
Professional Experience
Technical Lead
Virtono Hosting • 5 Years
- Led technical operations and infrastructure development for a growing hosting company
- Designed and implemented web hosting, cloud hosting, and VPS solutions
- Managed server infrastructure, ensuring high uptime, performance, and security
- Optimized hosting environments for speed and reliability
- Provided technical leadership for customer support and engineering teams
- Implemented automation systems to streamline service deployment and maintenance
Infrastructure Specialist
SysNestor • Current
- Provide infrastructure consulting and implementation services
- Design containerized application environments using Docker and Kubernetes
- Create custom monitoring and automation solutions for complex systems
- Implement security best practices and compliance measures
- Optimize infrastructure costs while maintaining high performance
Certifications
cPanel Professional Certification (CPP)
cPanel • Issued Apr 2021
Credential ID 479d-abef-bad9-a25a
cPanel & WHM System Administrator I Certification (CWSA-1)
cPanel • Issued Jul 2021
Credential ID 3e47-ed25-d317-8506
cPanel & WHM Administrator Certification (CWA)
cPanel • Issued May 2021
Credential ID 7328-a00d-cdba-7ec5
cPanel & WHM System Administrator II Certification (CWSA-2)
cPanel • Issued Sep 2021
Credential ID 265f-2277-d7f9-6206
cPanel & WHM Sales Professional (CPSP)
cPanel • Issued Aug 2021
Credential ID 12bd-305e-7c15-fcc6
cPanel WordPress Toolkit Certification
cPanel • Issued May 2021
Credential ID c376-dec1-adb8-0304
cPanel Imunify360 Certification
cPanel • Issued Jul 2021 · Expired Jul 2022
Credential ID c484-2ca4-014e-5ab3
cPanel LiteSpeed Certification
cPanel • Issued Jul 2021
Credential ID ca0c-72f6-7c4a-d135
Professional Events
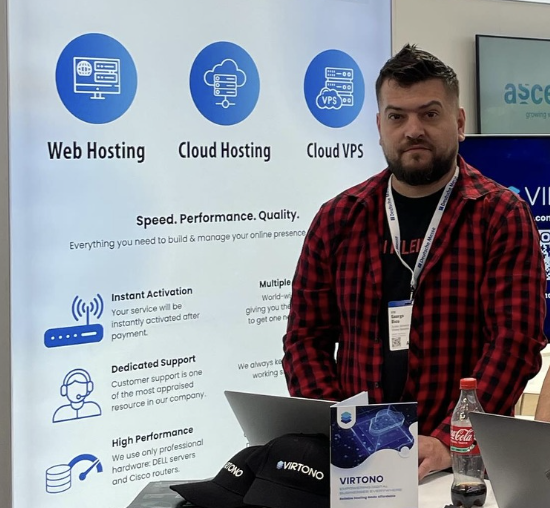
Virtono Hosting Representative
During my 5-year tenure as Technical Lead at Virtono, I represented the company at industry events and conferences, presenting our hosting solutions and technical innovations.
My presentations focused on web hosting infrastructure, cloud technologies, and VPS optimization strategies that help businesses achieve better performance, reliability, and security for their online presence.
Ready to Work Together?
I'm available for freelance projects, consulting, and full-time opportunities. Let's discuss how my skills can help bring your ideas to life.